Spending just a bit of time painting a planter pot will give you a pretty and unique planter! It doesn't take long to do, is not expensive but can give you a fun and distinct high-end look.
Painting plastic flower pots
This is such an easy way to make them look pretty or to stand out! Surprisingly, with all the color variations we see on plastic items, it's rare to see a pretty plant pot.
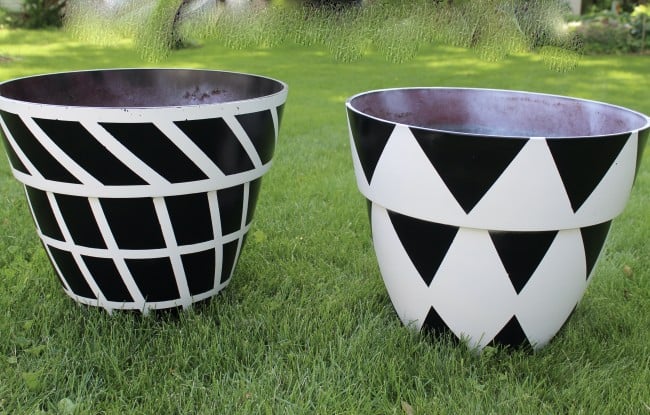
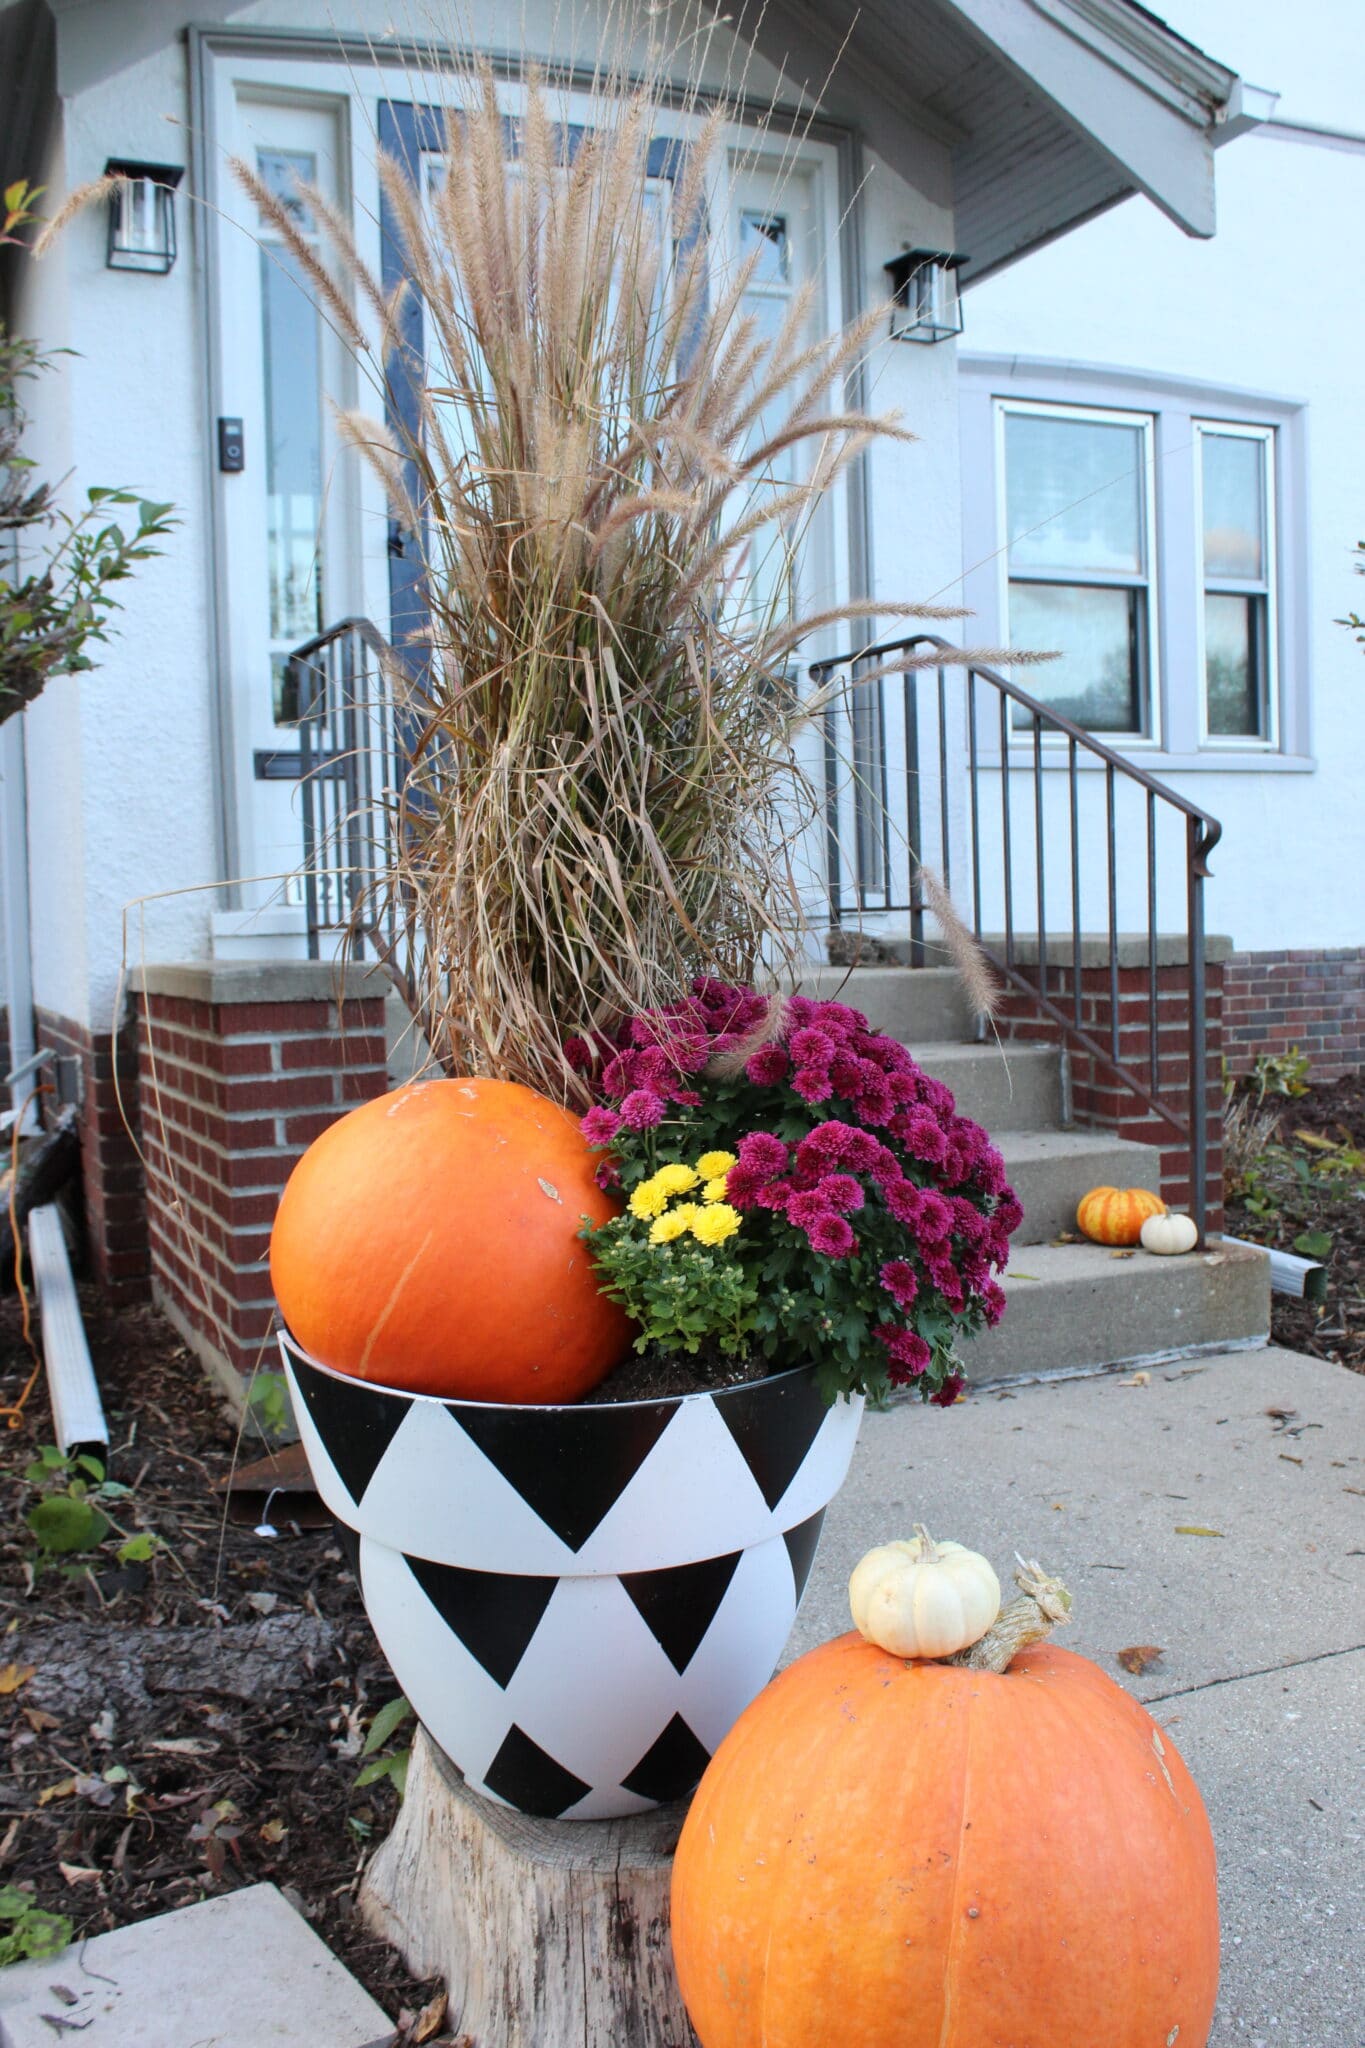
Look at this fun black and white triangle design on my planter on the right. I wasn't sure if this project would work but it sure did!! And, judging from the comments I get when I'm out in my yard, people like the bold designs on the planters.
Black and White Flower Pots
If you are looking for large flower pot black and white painting ideas, you are in the right place! This pot has a circumference of almost 40 inches, so it is big! Obviously, you can scale your design to any size you'd like.
Where did you get your idea/inspiration to paint a black and white planter?
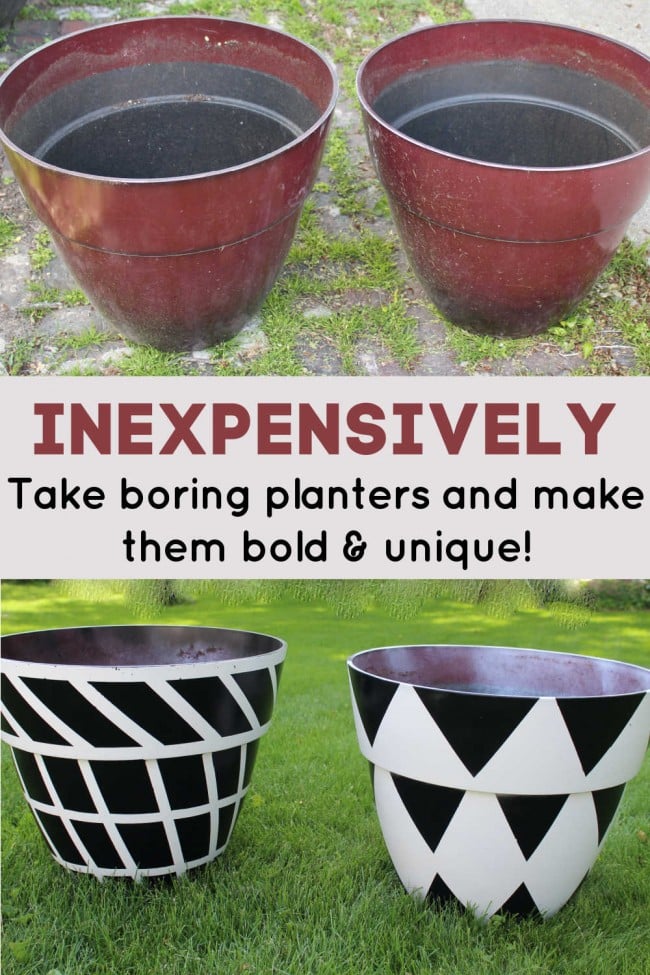
I saw black and white designed flower planters in a Frontgate catalog that was mailed to my house. I absolutely LOVED the styles of the outdoor flower pots shown and really wanted a black and white container garden! BUT, the planters would have cost me over $250 each and would have been about ⅓ of the size of the planters I already had. After walking around with that ripped-out page from the catalog in my purse for about a week, I decided I could make something similar for a fraction of the cost!!
***Update***
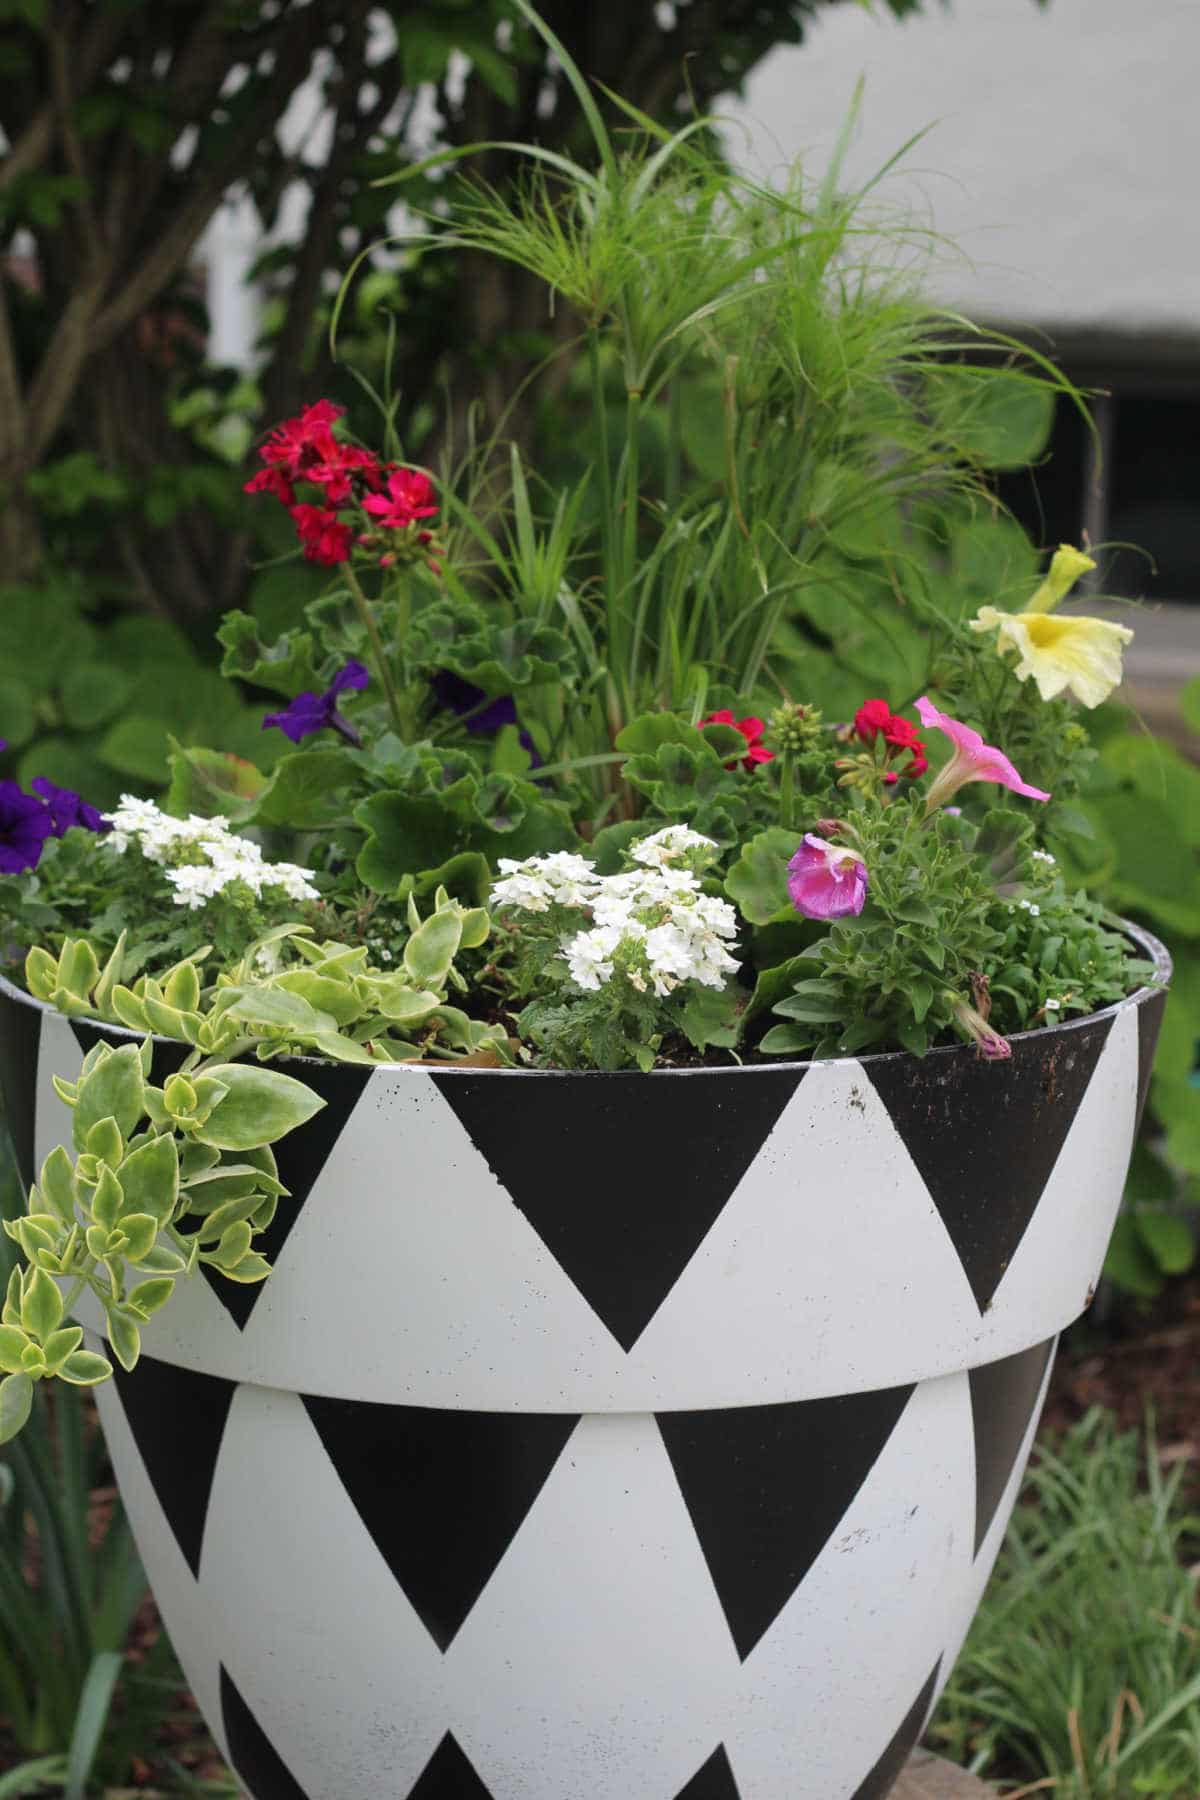
The planter below is now 4 years old! It is kept outside in Wisconsin and used for year round seasonal pots.
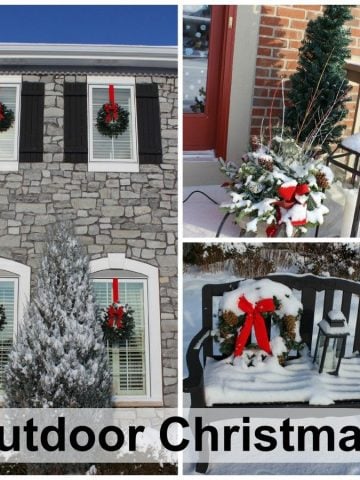
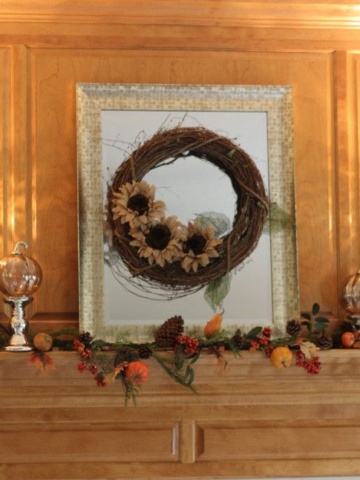
I've been asked to share my fall planter posts so here it is!
My Fall Planters!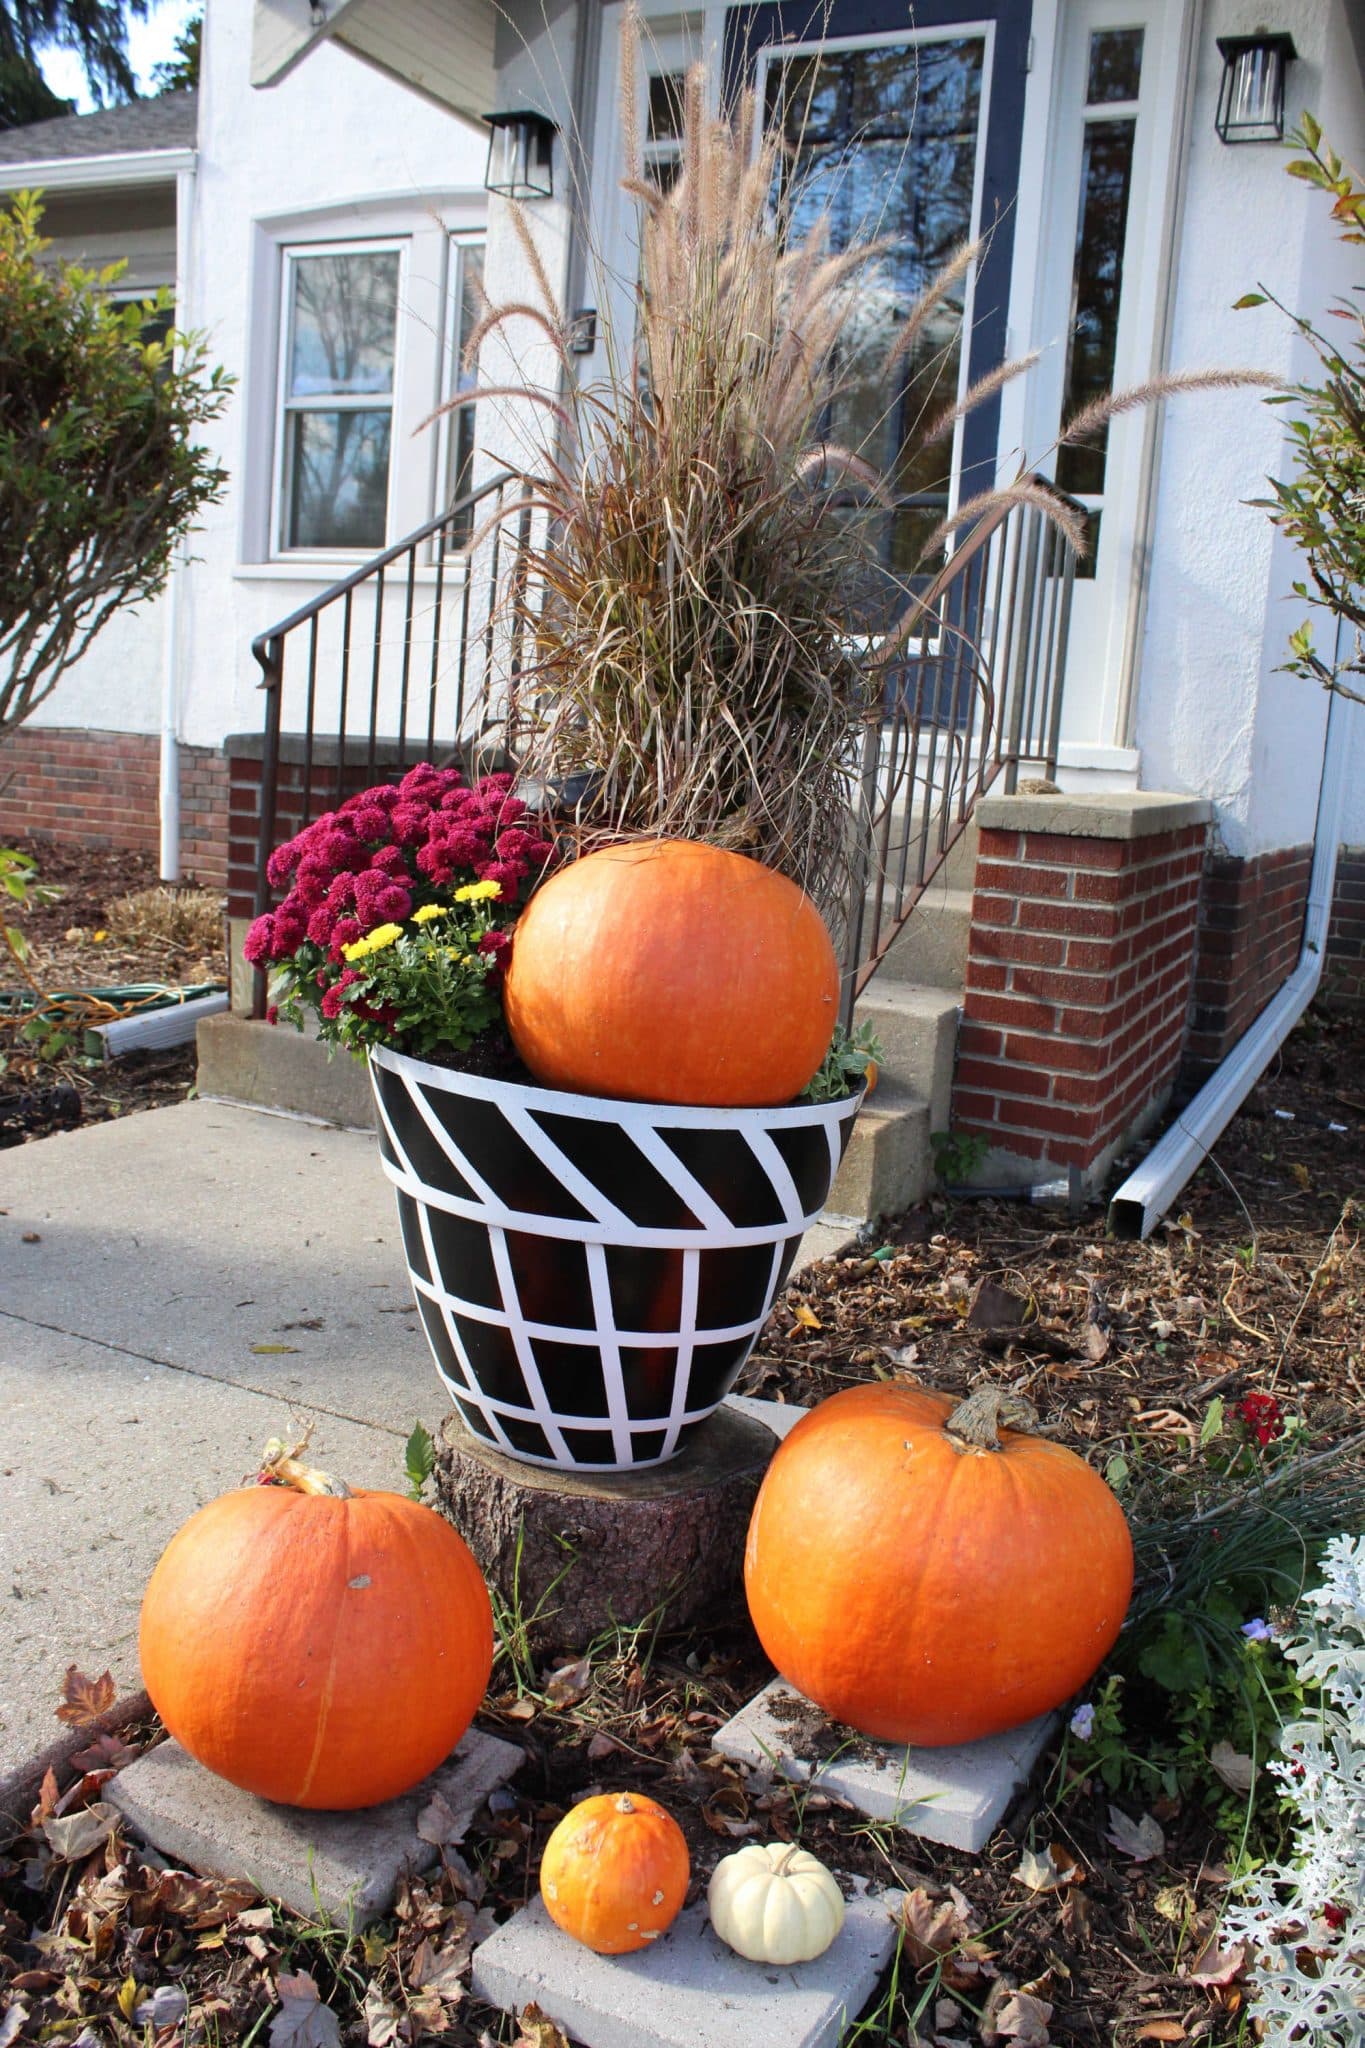
Supplies to paint planters
Planters (mine were plastic). Use some that are in good shape.
My planters are 39 inches around the top.
Sandpaper & sanding block or small sander
white spray paint (1 can)
**I used a Rustoleum paint that specifically said it bonds to plastic. Other brands have spray paints that also are for painting plastic.
Instructions
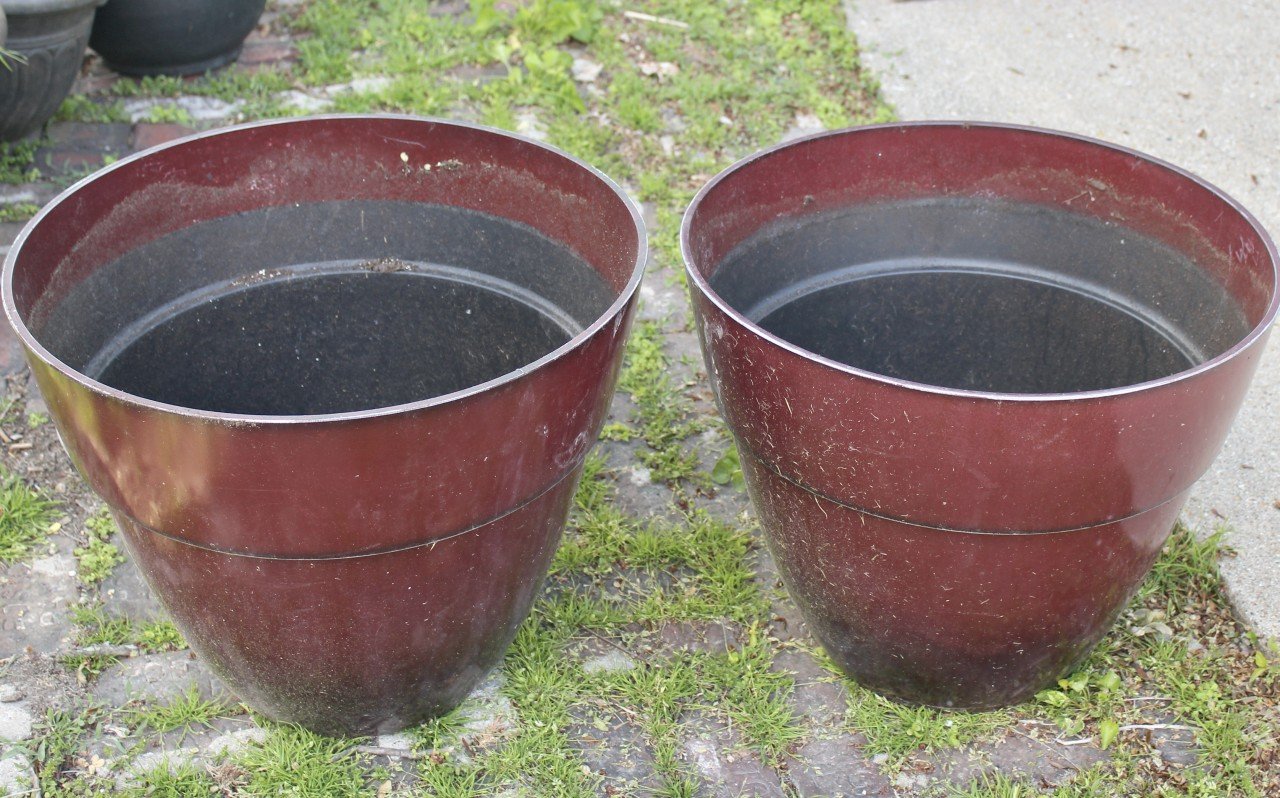
If you are looking to recycle or upcycle flower pots, this is how! Empty pots and spray thoroughly with water to get any dirt off. This is the 'before' of my two planters. I had purchased them because they were BIG. These planters are 39 inches around the top. They were a lucky clearance find at Costco a couple of years ago. But, I never loved the color!
Do a quick rough sand to get the glossy finish off and to smooth any imperfections.
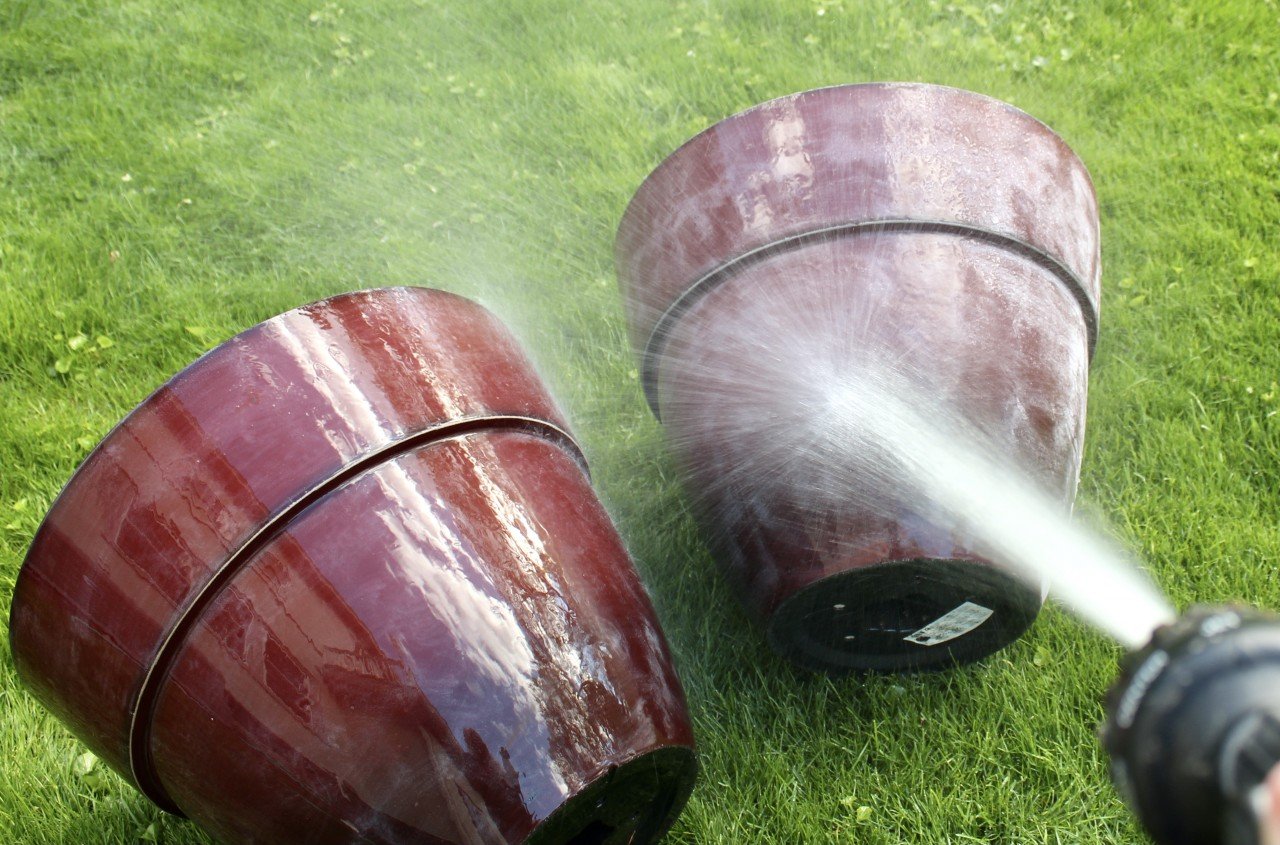
The planter on the right is what the planter looked like right after sanding. I just used the jet setting to spray the sanding dust off of my planters.
After the planters have dried, spray paint the base coat on. I painted them both white.
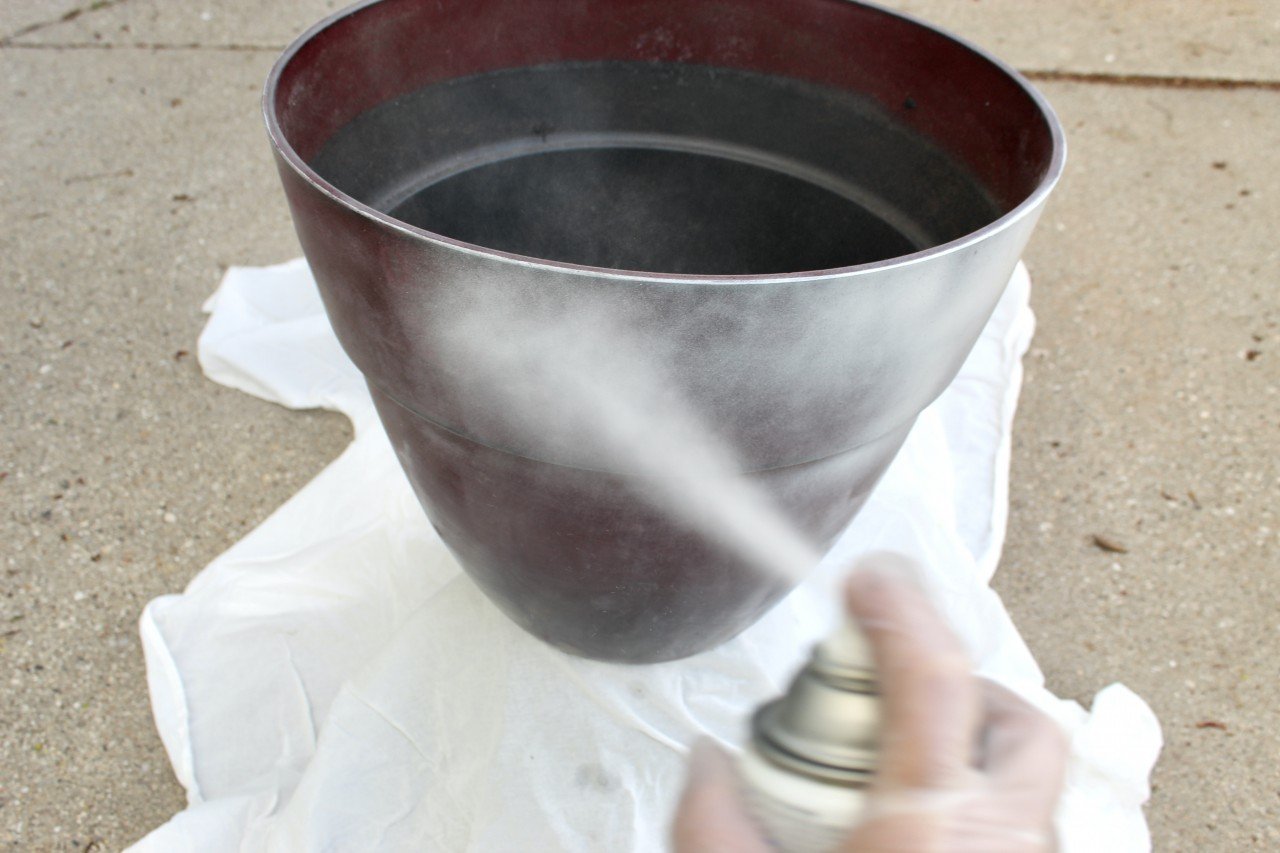
It's hard to see here, but I have the pot elevated with a small pot so I can easily paint the bottom edge. Then I have an old sheet (that I use when there are frost warnings) covering everything so I don't paint my driveway.
Make sure to follow the directions on the paint can as far as weather and technique! Less is more. You are better off painting extra thin coats than trying to rush the job and get all kinds of paint runs.
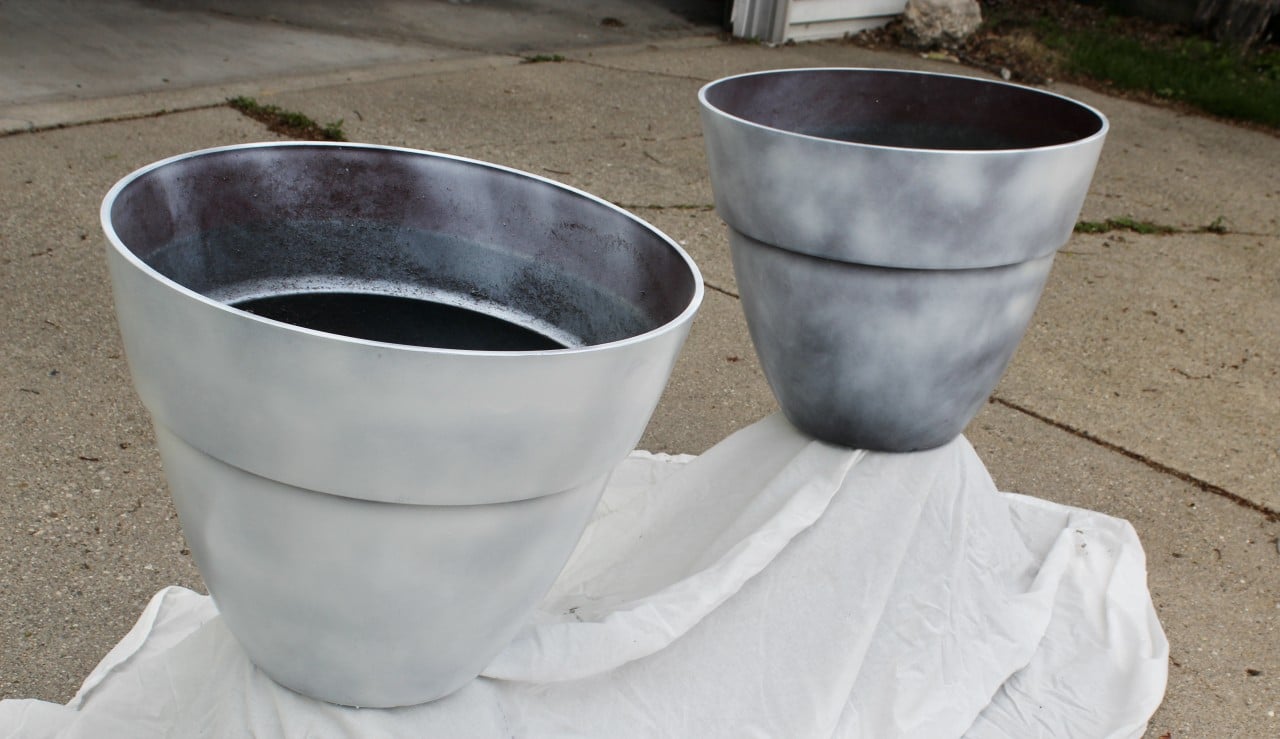
It took three coats to fully coat these. The one on the right had one coat and the closer one (on the left) had two coats. After three coats, they looked like I wanted them too. This does not take long to do! The paint is dry to the touch in a few minutes and then I just painted the next coat. The only thing that makes this take long is if you don't buy enough spray paint and you have to get more paint!
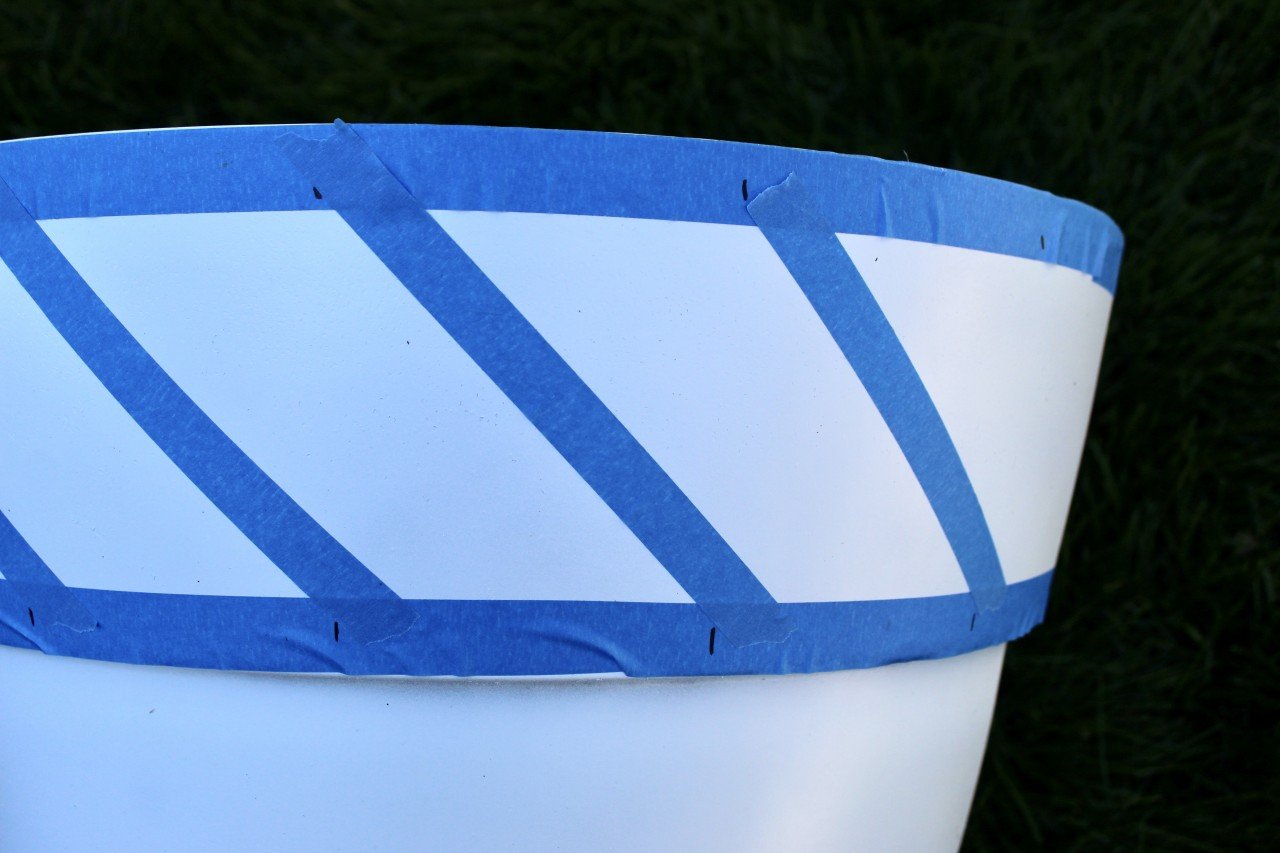
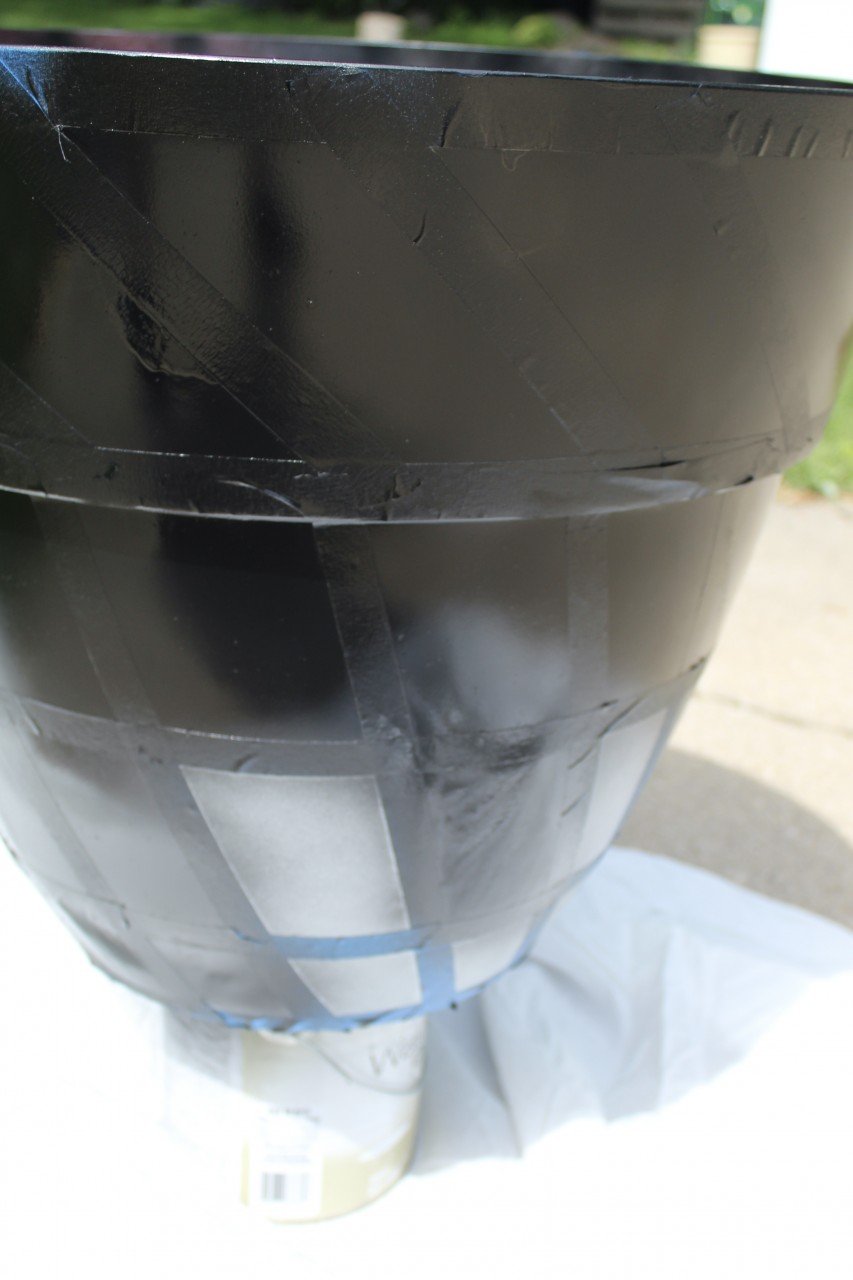
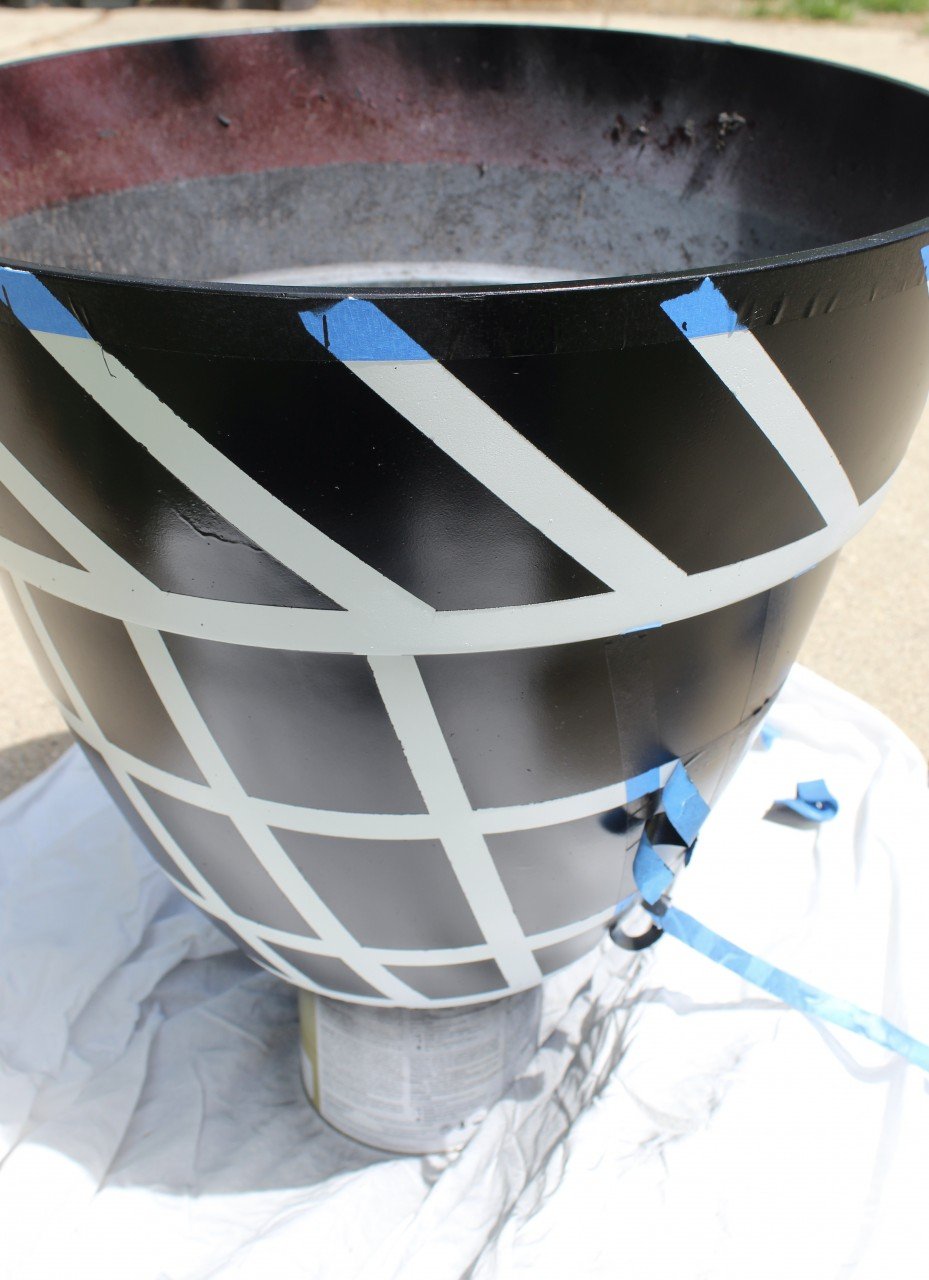
The first planter that I painted, I used a lot of math and strategy. I figured out that if the circumference was 39 inches and I wanted each shape to be roughly 5 inches wide, there would be 8 shapes. I marked the measurements on the painter's tape.
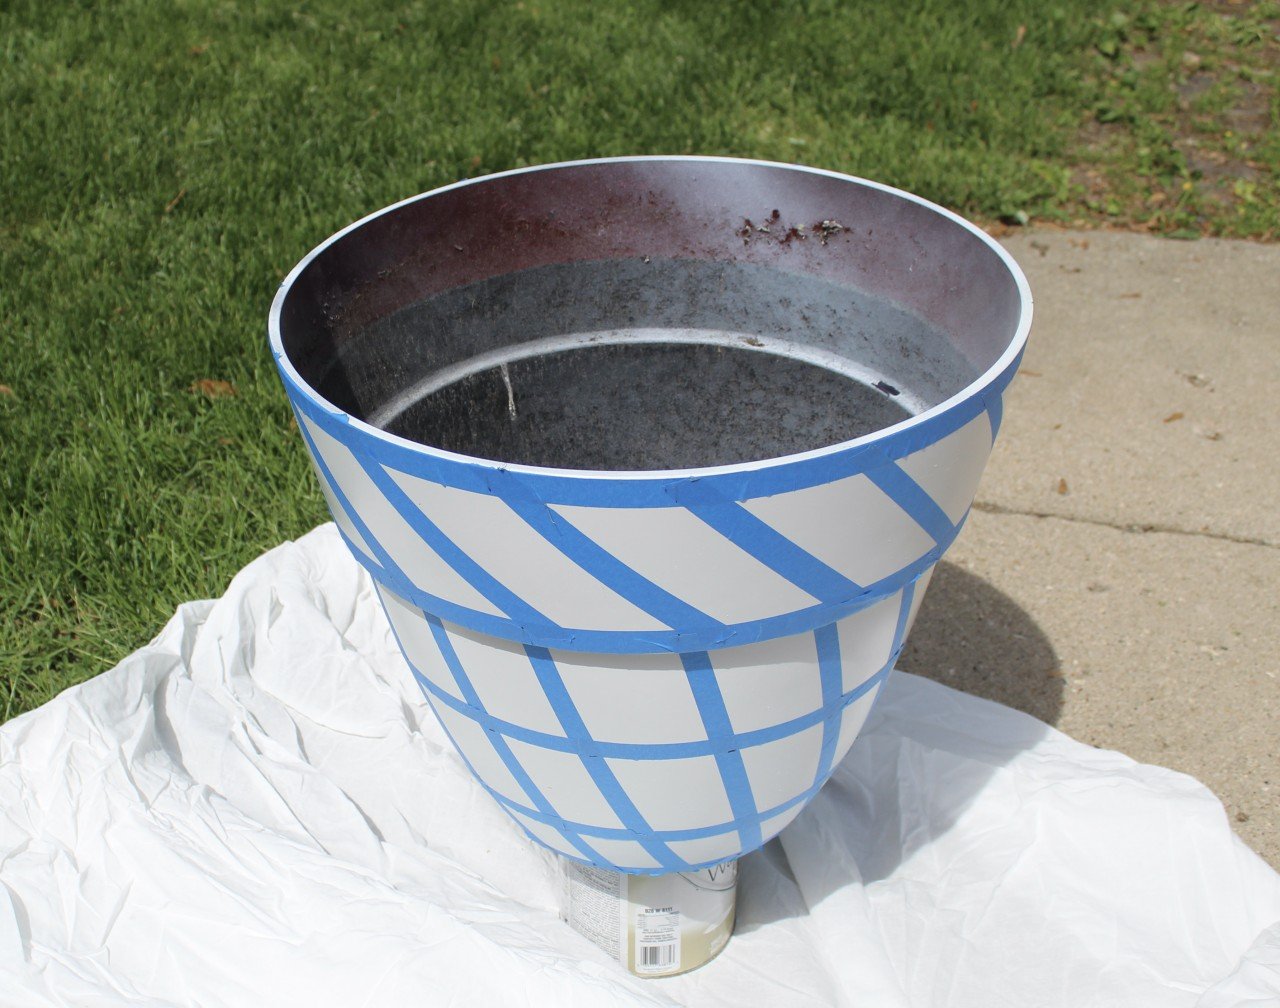
Honestly, after I spent all the time measuring the top section, I became impatient. I eyeballed the bottom section and it turned out just as nice but way wayyyy faster. The key was to try to make sure the design looked even. For example, I tried to keep the shapes the same size and the tape the same angle.
Before spray painting. Make sure all the tape (especially the ends & edges) are firmly attached. I just did that by hand. Then I spray painted the pots with black spray paint.
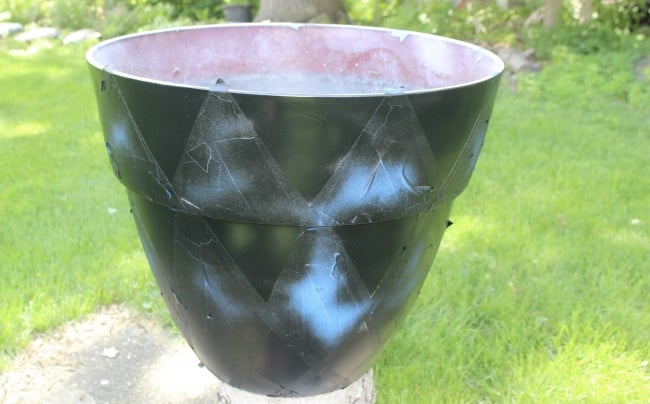
My neighbor couldn't figure out what the heck I was doing and came over to see what my project was about! Can I tell you that it was really fun pulling the tape off and exposing the white lines? I was honestly surprised at how sharp the lines were!
I only painted two black coats and waited about ½ hour before pulling off the tape.
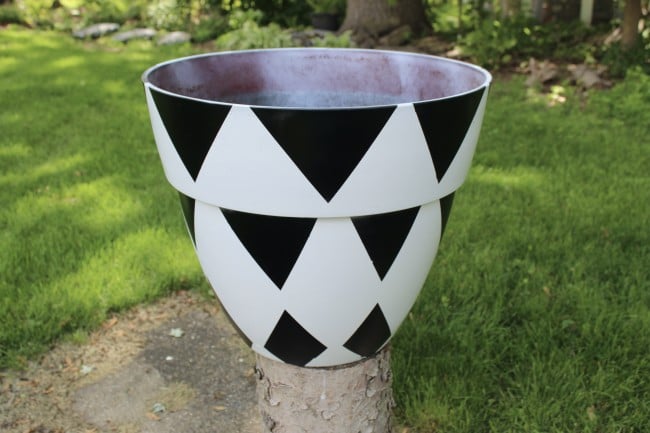
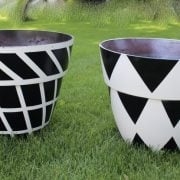
The black and white triangle painted planter
I totally eyeballed the placement of the painter's tape on this one. It was MUCH quicker and turned out just as good. Actually, this planter is the one everyone seems to love the most!
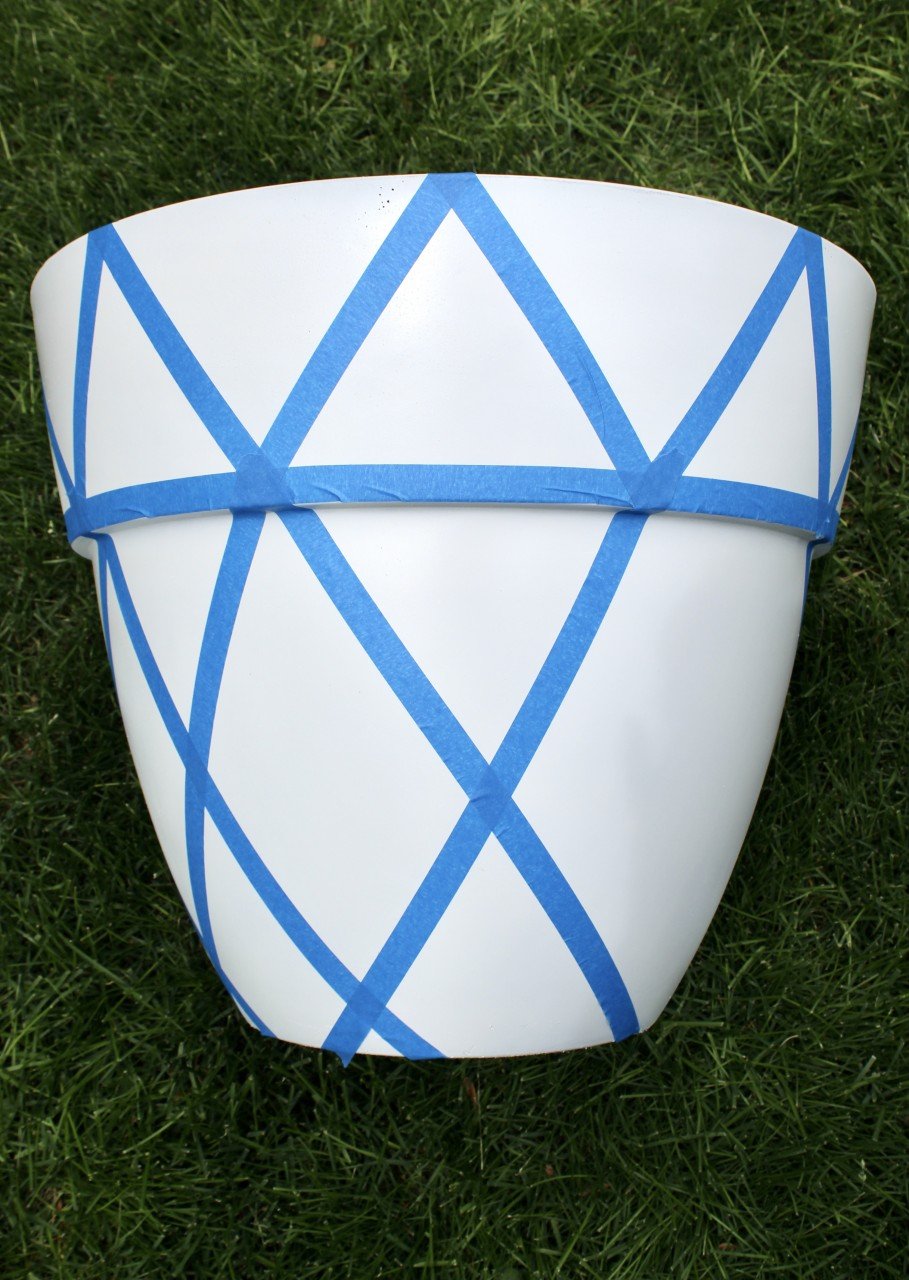
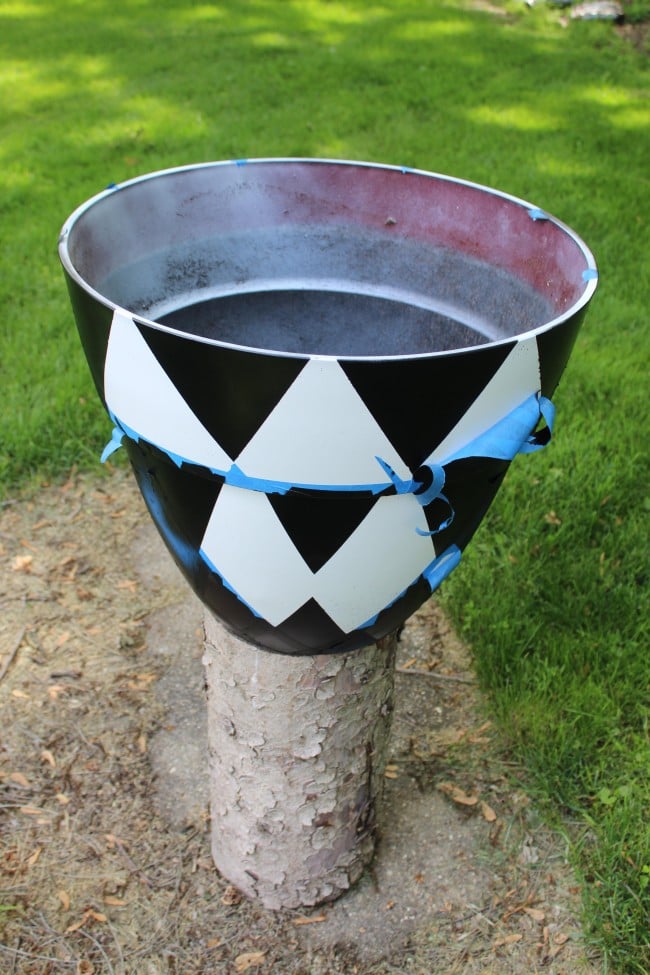
I put the painter's tape in a triangle formation, making sure each triangle was roughly the same size. The joy of painter's tape is you can reposition it!
I wanted some solid black parts and also to keep some triangles and diamond shapes white. So I just carefully filled in the parts I wanted white with lots of small pieces of painter's tape.
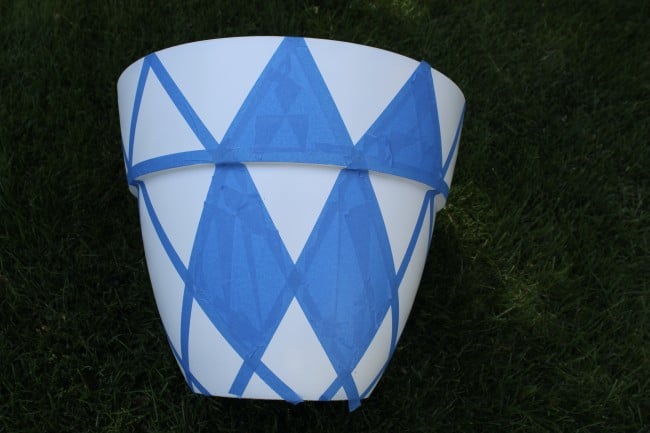
You can be a precise as you would like to be. The more precise you are, the longer this project will take. I didn't measure anything with this one. I just tried to keep the sizes visually the same and kept the lines from the top section to the bottom even. I also visually tried to keep the sections where the painter's tape crossed even from the bottom so the finished design would look uniform.
Two light coats of black spray paint about 20 minutes apart was all this took!
I have to say the most enjoyable part of this painting project was pulling off the painter's tape. I totally enjoyed exposing the patterns and straight lines!
The finished black and white triangle & diamond-shaped painted planter.
Here are my two planters side by side. I debated making two the same but really wanted to do two different patterns. I decided I don't have to have matching planters, I'm going for the artsy coordinated look.
One positive thing that happened is these plastic plants look much more high-end. They even look like they might be made out of a heavier material like cement.
This is one of my favorite spray paint projects! I could have paid over $500 to get two much smaller black and white planters. But I bought about $20 in supplies (spray paint on sale and one roll of painter's tape since I also used up some old tape).
Don't be afraid to try spray painting things. They always turn out better than I expect and I get unique pieces at a very inexpensive price.
Some of my other spray painted projects
Spray painted herb garden planter (updating a kitchen container)
Spray paint your old Christmas village white!
Flower Pot Painting
Materials
- 2 large plastic planters
- 1 piece sandpaper
- 1 block sanding block
- 2 cans white spray paint I use Rustoleum paint that specifies it bonds to plastic
- 2 cans black spray paint
- 1 roll painter's tape
Instructions
- Empty pots and spray thoroughly with water to get any dirt off.
- Do a quick rough sand to get the glossy finish off and to smooth any imperfections
- Place pot on protected surface (tarp, garbage bags, old sheets) and elevate pot so you can spray bottom edge without having to turn pot around.
- Ensure planters are thoroughly dry, then spray paint your base color on (in my case it was white). Thin coats are best. It took me 3 light coats (do not spray heavy coats).Read the back of spray can for information of temperature, technique and drying time.
- Tape your design onto pot with painter's tape. All covered areas will be white when tape is removed.
- Ensure everything you would like to be your base color (white) is covered well with the tape. Double check!
- Paint any exposed area with the secondary color (black). Thin coats! The black only took me 2 coats for each planter.
- Once you have ensured spray paint is dry (per can instructions), fill with soil and happy planting!

Leslie
I love these pots! They will definitely elevate any exterior…it will take your curb appeal up a couple of notches! So creative, thanks Susan
Kim
Classic colors for any season! Just beautiful!!
Kate
These are so fun! I love the black and white geometric patterns that you chose to do and that they cost so little to transform!!
momcrieff
Thanks for your kind words! I'm just planting them for their second year and am happy to report they are just as pretty and the paint held up perfectly over the winter.
Sara
These are both fabulous! I wouldn't have the patience to even start with doing the math lol! So i don't blame you for winging the rest. Couldn't have turned out better!
momcrieff
Sometimes, I just call a project ART. Then it shouldn't involve math!
Brooke Fedigan
What a fun project! I just love DIY planters. We have planters all over our backyard, patio, and garden. This is for sure giving me some amazing ideas to try. Thank you for sharing!
Rosemary Palmer
No telling how many coats of paint some of my planters have - such an easy, and cheap way to change things up. And black and white has always been a favorite for me.
Michelle Leslie
My hubby says I'm obsessed with planters, so he's going to flip when I steal your idea for some of ours 😀 I love how they turned out, Susan
momcrieff
They are fun to make and inexpensive if you use a planter you already have!
Sara
Love how these turned out. Black and white is classic!
Denise
The planters turned out great. I love the black and white. i have a couple of planters I'd like to try this on.
momcrieff
It's been almost 5 months since I've made these planters and they still look great! I think you will be pleased with the results when you make yours!
Anita Holland
Wow, they look so classy and expensive. I would never have guessed they were plastic. The colours and designs you chose work perfectly together.
Cat Michaels
Wow! I spray paint my planters all the time, Susan, but just a single color. Can't wait to try your technique to do those awesome geometric designs. Thanks for the tips!