Halloween just isn’t complete without a glowing jack-o-lantern on the front porch. Carved pumpkins are a tradition that never gets old, but finding the best way to light them can be tricky. Candles can be a fire hazard, LED lights often burn out quickly, and plug-in options aren’t always practical.

That’s why I started making solar jack-o-lanterns. They’re inexpensive, safe, and light up automatically every evening. In this tutorial, I’ll show you how to carve your own solar-powered pumpkin and also share other jack-o-lantern lighting ideas and fun carving inspirations. If you want to look at my carved pumpkins over the years, here are some of my front porch jack-o-lanterns over a few years.
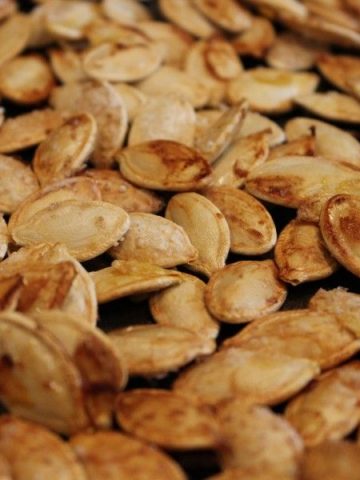
I love decorating for the fall and Halloween. Of course, there is nothing better than carving pumpkins! Except when your kids leave you to do them all yourself! One of the reasons I love carving pumpkins is I get to make roasted pumpkin seeds. Try my recipe! It's easy and delicious.
Table of contents
What Is a Jack-O-Lantern?
A jack-o-lantern is a carved pumpkin (or sometimes turnip!) with a light inside. The tradition started centuries ago in Ireland and became a Halloween staple in North America when pumpkins replaced turnips.
Today, jack-o-lanterns are more than just spooky faces – they’re a chance to get creative with patterns, expressions, and unique ways to light them.
Why I love carving pumpkins this way
It's quick and easy. No sharp knives are involved!
They’re budget-friendly – my large pie pumpkin was $2 and the solar light $1.
I love that the light is a solar light instead of a candle. You also don't have to buy an expensive fake Jack o' Lantern with a cord that you have to plug in and keep dry.
Your kids will be impressed that you use power tools!
Best Pumpkins for Jack-O-Lanterns
Not all pumpkins carve the same. Here’s what to know:
- Carving pumpkins (jack-o-lantern pumpkins): Larger, thinner walls, easy to scoop and carve.
- Pie pumpkins: Smaller, denser, better for cooking. They work for small solar lanterns too.
- Specialty pumpkins: White, warty, or heirloom pumpkins add character if you want something different. Many people use them 'as is' rather than carve them.
Supplies
Pumpkin - you can get a larger one or even a small pie pumpkin.
Solar light - an inexpensive one will do.
A Hole Saw Set - You don't need an expensive set. This is a similar hole saw set from Amazon. But you might be able to get one cheaper at your local hardware store.
I ended up buying this set, and it had everything I needed.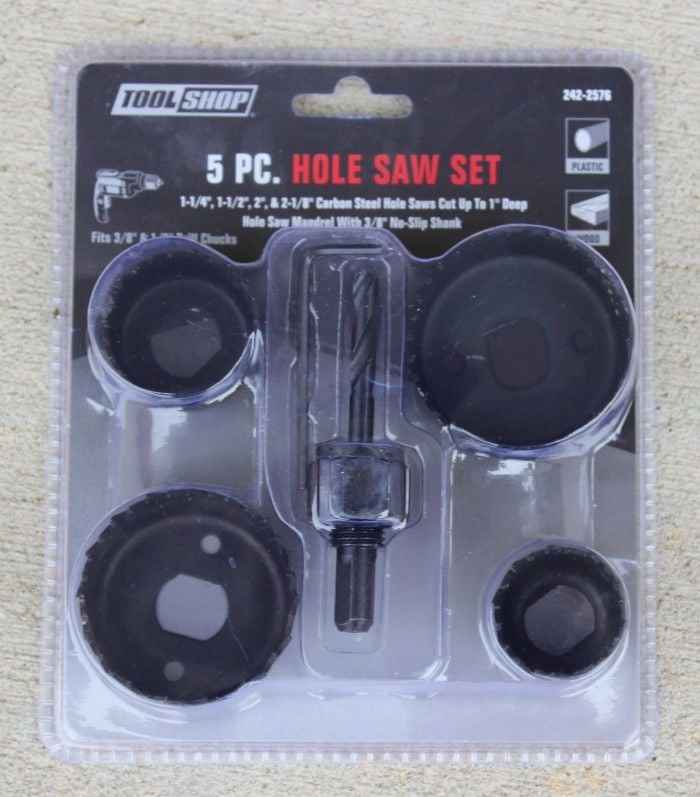
Let me save you from having to do charades at a hardware store. Just a reminder, it's called a hole saw set. And you find these in the area selling drill bits. Let's get started and I'll show you how I turned my pie pumpkin and my $1.00 solar light into a solar Jack-O-Lantern.
Instructions
Step 1
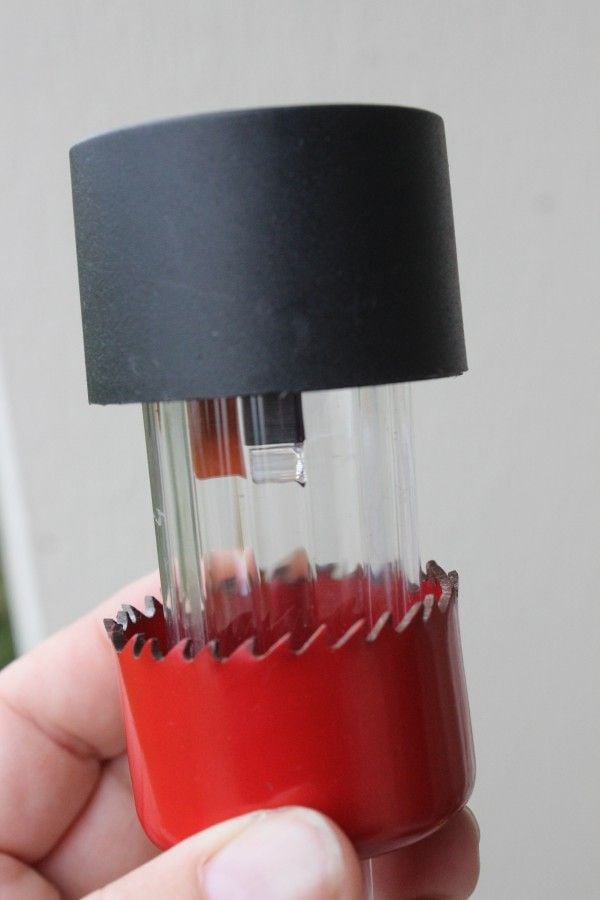
Find a hole cutter that the solar light will fit through but is small enough so the top part won't slip through m(the part of the solar light that collects the solar power).
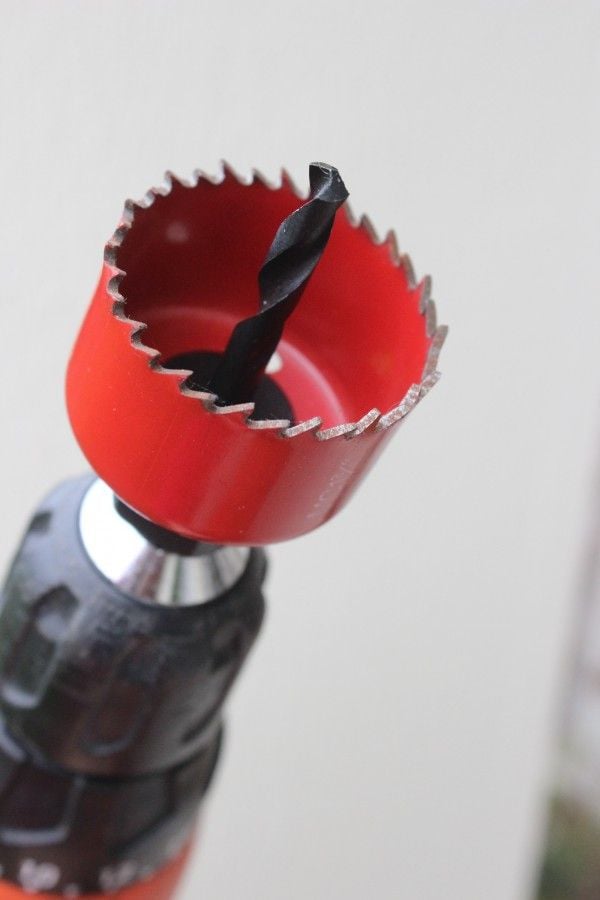
Step 2
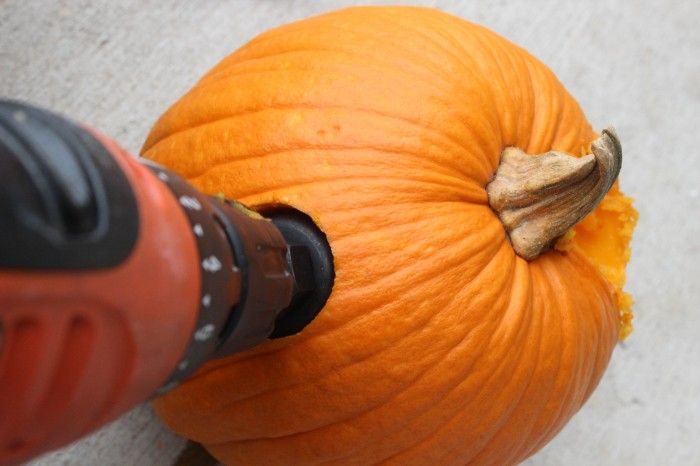
Attach it to the power drill. This is what it looks like. There is a drill bit that drills a small hole, and then the larger hole gets drilled by the red hole saw.
Step 3
I cut my hole just behind the stem. I wanted to leave the stem on.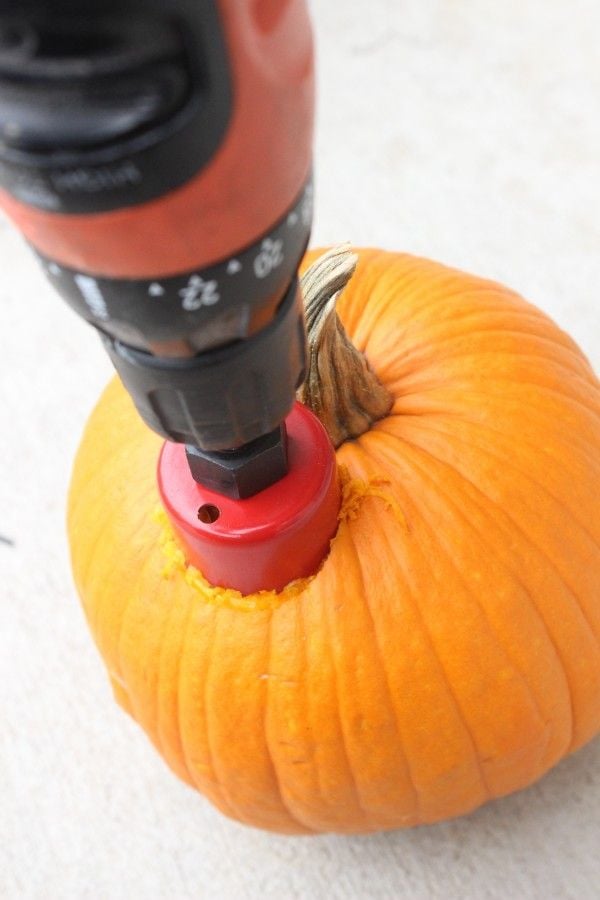
Step 4
Pull out the pumpkin part from the pumpkin. Good thing I can show you a picture because that sentence isn't a good description of what to do!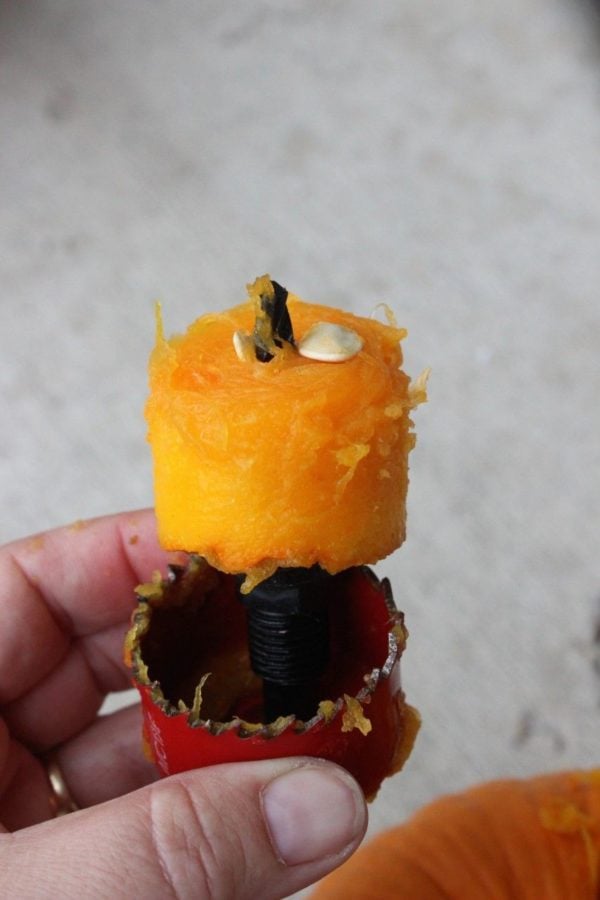
Step 5
I then switched to a smaller circle-hole cutter.
Yes!! I used my drill to cut the eyes out {gasp}. I know!! Well, the truth is, I don't have little kids anymore, and I don't have to fight with the pumpkin to cut out funny-shaped eyes and a weird mouth anymore. Round cut with a circle cutter is just perfectly fine in my world now!!
**I carved my pumpkin with a drill! Yes, I did!**
I also used it to cut out the mouth. I cut it so there would be jagged 'teeth'.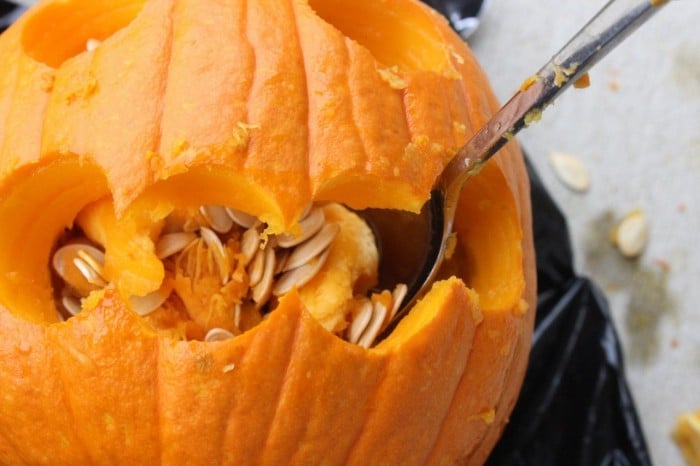
Step 6
I grabbed a spoon to scrape the 'pumpkin goo' through the mouth. It worked fine and took less than 5 minutes.
After I scraped the 'goo,' I used a small sharp knife and just thinned the pumpkin around the cut areas.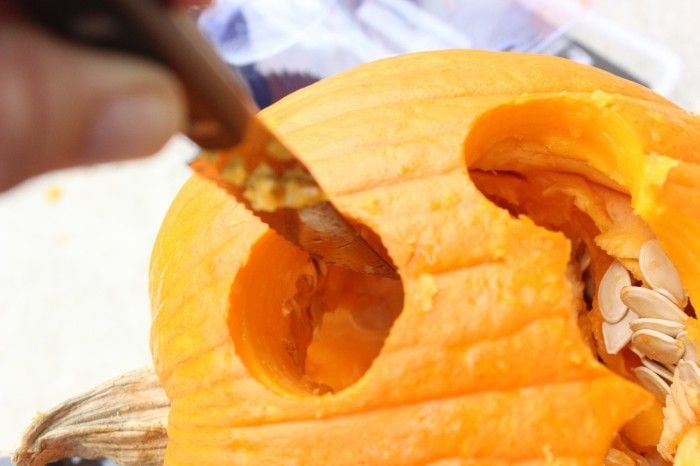
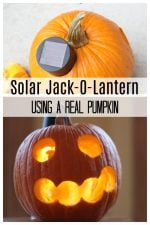
After I cleaned the inside and the edges, I popped the solar light in.
All done!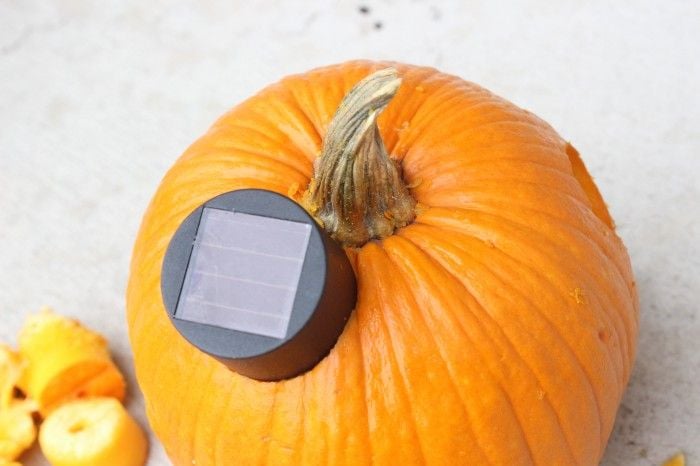
Perfect fit!
I left my newly carved Jack-o-Lantern so that the solar light charging surface was facing the sun for a few hours.
Ta-da! Isn't it cute! I was quite excited that it worked. I have carved Jack O'Lanterns this way for a few years now. Those little solar lights give off the right amount of light.
Other Ways to Light a Jack-O-Lantern
Here are other popular lighting options (not using candles):
- Tea light candles – traditional, but keep safety in mind.
- Battery-operated LED candles – flicker without the flames.
- Fairy lights – create a magical glow inside the pumpkin.
- Glow sticks – fun, colorful, and kid-friendly.
FAQs
Nope. Just round. But you can join the circles!
Probably. I would test it in an area that isn't conspicuous. Sometimes, it will tear into the material (the styrofoam type) that the fake pumpkins are made of.
Usually 5–10 days outside, depending on weather. Spraying with a light bleach solution can help it last longer.
The Finished Jack-O-Lantern
The pumpkin was $1.99, and the small solar light was $1.00. Not bad for a $3 project!
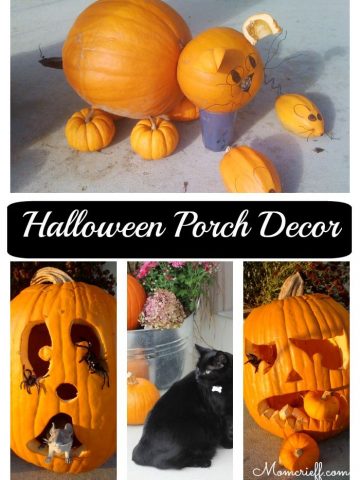
Some other Halloween decor/decorations

Please post this to your Pinterest page!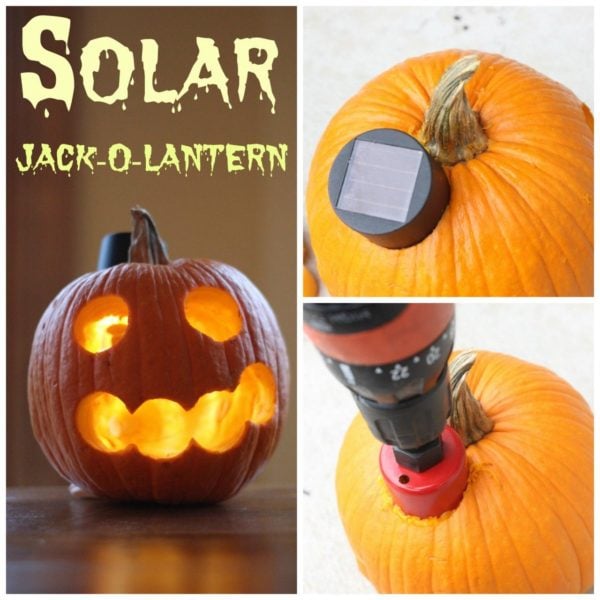

Miriam Ebert
Great idea, Susan. My grandsons want to do this now.
Maria
What a great idea with the saw. I have to try that for my next pumpkin.
Anita Holland
Very cool. I love that you used a hole saw on the pumpkin, I cant believe I have never thought of doing that.
Sara
Such a cute project - glad you found what you needed despite that weird hardware guy! Guess he doesn't like Halloween!
ellen bell
What a great idea, I love this!! And you idea of putting pre packaged candy out on the sidewalk is perfect.
Carole @ Garden Up Green
Brilliant!! I would have never thought about using power tools to carve out a pumpkin. I may have to get a pumpkin this year for caring . Great idea!
Holger Marten (eetscribe)
"That’s when the guy said he’d had enough and that he was leaving." HaHa.
I have to buy spare and replacement parts for work. Half the time I have to get a part, "...that connects to one of these, but lets me put one of these on the other end, so it can connect to one of these things."
I honestly don't know what I would do without bringing in pictures, on my phone.
Tianna
this is such a brilliant idea! I love that you made it eco!
stop by and chat 🙂 http://storybookapothecary.com
Linda Szymoniak
I just have one question. Where did you get the $1 solar light? I read and reread the post and don't see anywhere that you say where you got it. While I might not be using it for pumpkins (I'll be out of town on Halloween weekend), I have other projects I would love to use them for. Thanks!
momcrieff
I'm sorry! I just bought these at the dollar store. They were just the small ones for $1.00.
momcrieff
Hi! I normally get cheap solar lights at the dollar store.
Patti
Great idea. Especially for little ones. Pinning.