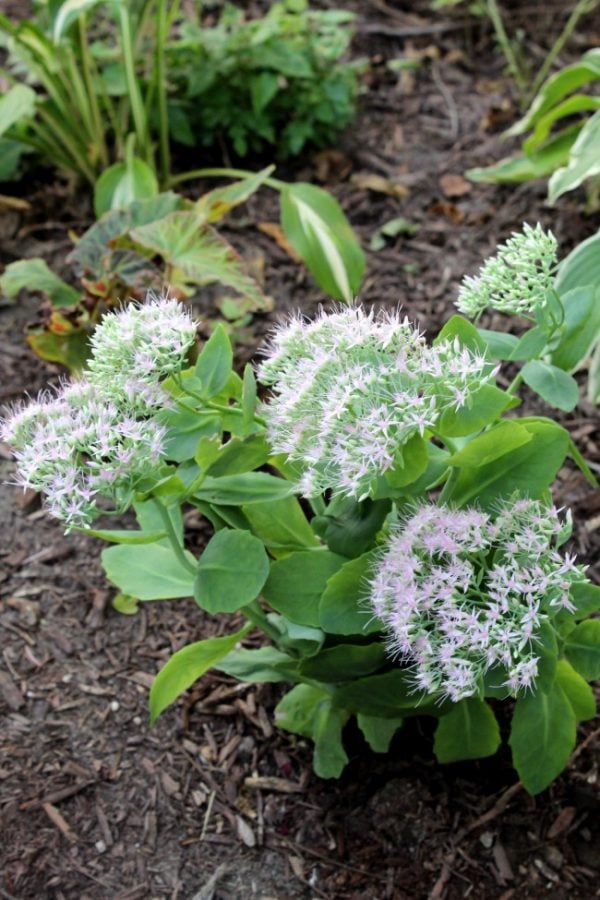
The sedum autumn joy is a plant I LOVE for many reasons. First, it is a sedum and also a succulent. It looks wonderful for the majority of the year. I even leave this one up during the winter because it adds winter interest to my yard. As the growing season changes from spring to fall, it grows and changes in appearance. The image below is what autumn joy looks like in the summer.
Autumn Sedum Joy
It is low maintenance and is a beautiful plant! Plus it's easy to propagate. What more could you want from a flowering plant in your garden?? I do enjoy growing succulents and hens and chicks are another favorite you may want to explore.
Table of contents
Bloom Time
The succulent foliage is beautiful in the spring and early fall, and the flowering plant blooms are beautiful in the late summer and fall. The autumn sedum is a herbaceous perennial with an upright habit of growth. An herbaceous perennial means it is soft stemmed and it will die down to the ground in the winter (but we need to remove what is left in the spring). It is a beautiful large succulent. I think of it as a small shrub.
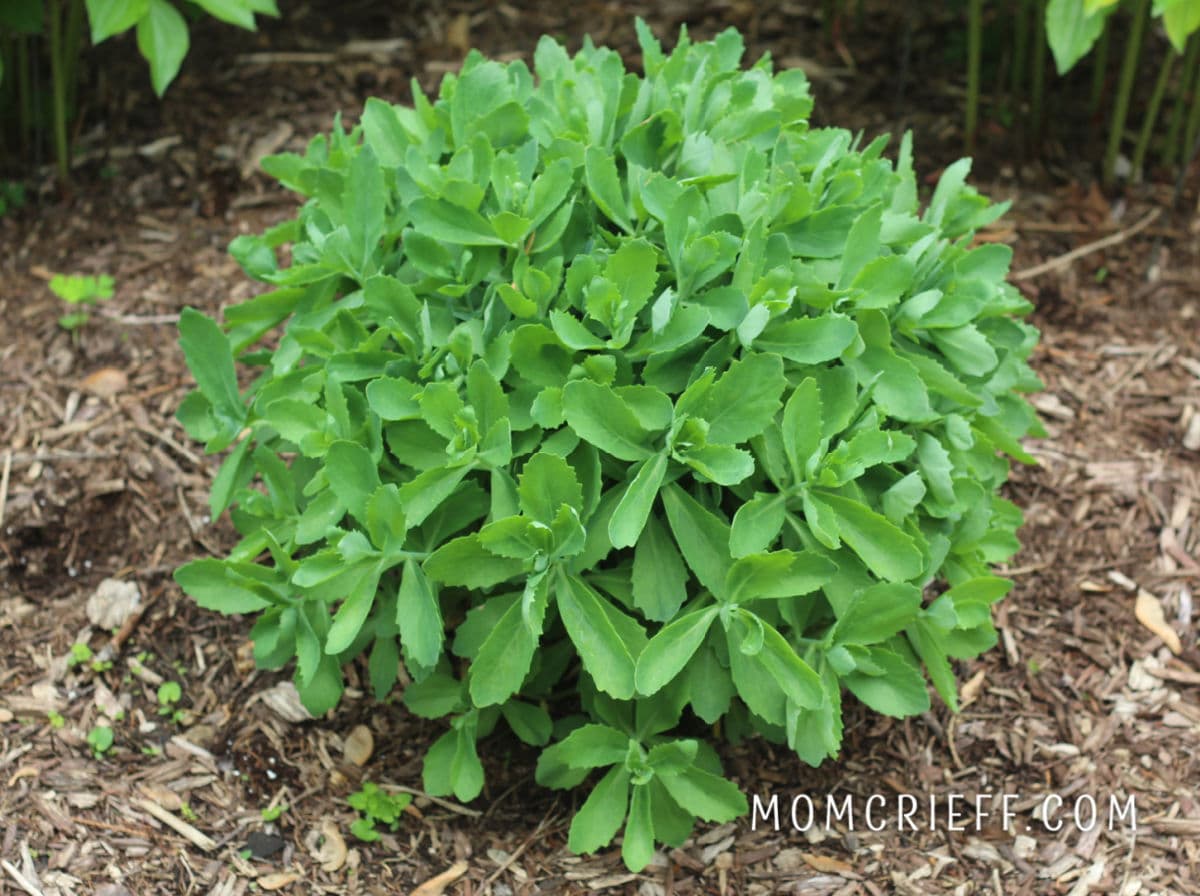
Here is what it looks like in the early spring. A beautiful dense mound. It is a very pretty green.
In early Summer it blooms and the flowers start out as green. Then they turn a pretty reddish burgundy. Images of early and late summer are further below.
Overwintering
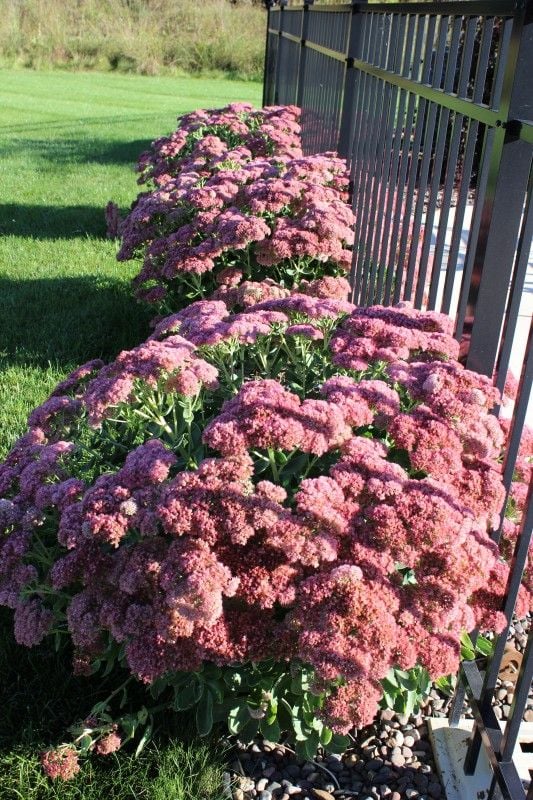
This is one of the few plants I leave up over the winter because the flower clusters turn into a rust color. It stays upright which adds to visual winter interest in the winter. The dried flower heads retain color all through the winter. It's a beautiful and tough plant that is not harmed by neglect. That's saying a lot because I live in Wisconsin (zone 5)!!
A friend of the pollinators
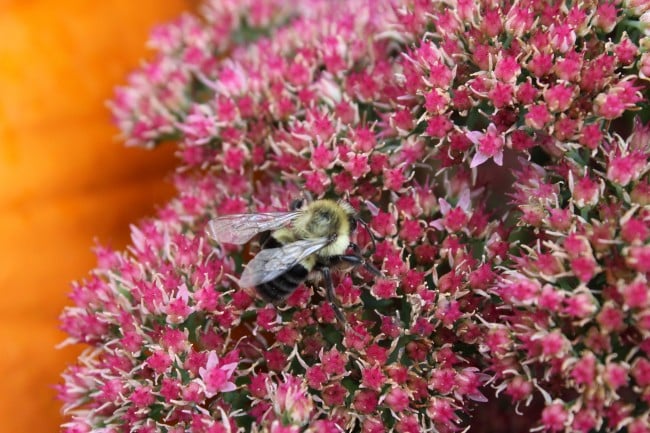
One of the reasons this plant is often not cut down is because the stems are a winter habitat for insects. Don't forget that not all insects are pests! Insects such as pollinators are necessary for our food to grow. Butterflies love this plant and so do bees. They overwinter and are also protected in the stems during the cold snaps of the spring.
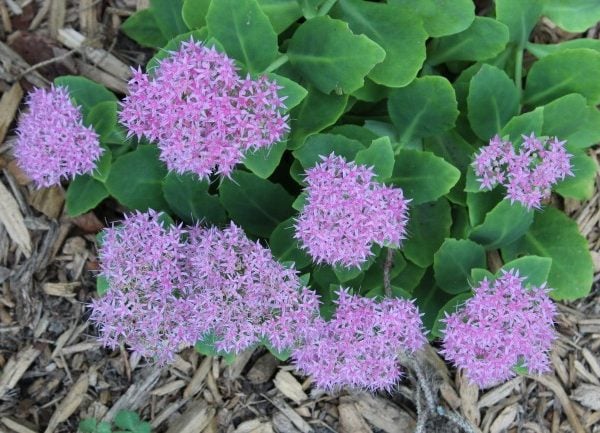
This is a closeup image of what the actual flower clusters looks like. You can see why bees love it!
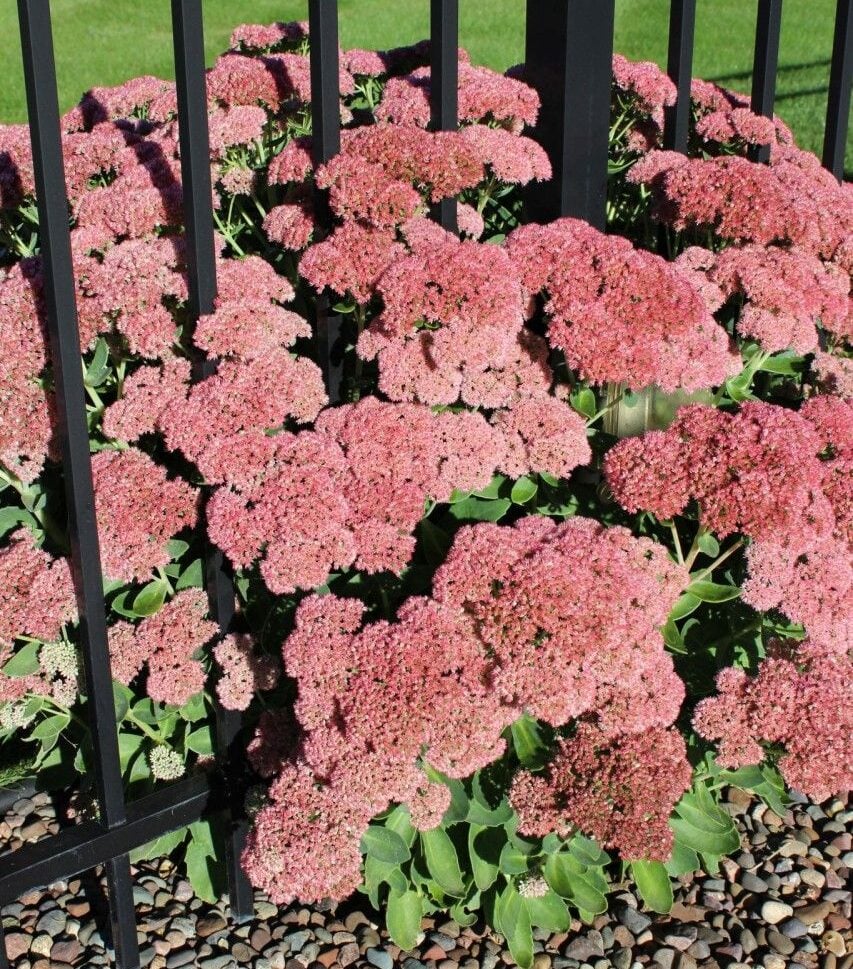
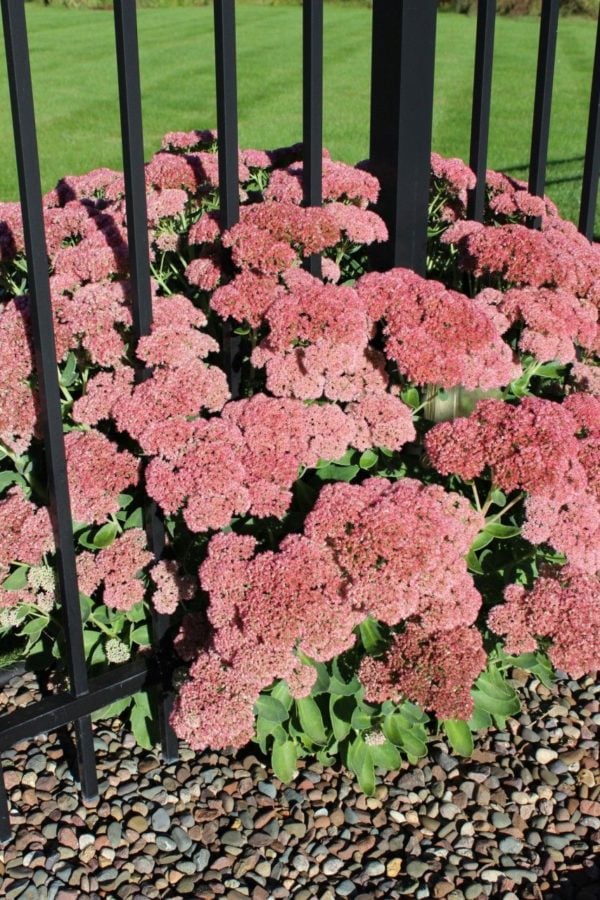
Below is what the Autumn Sedum Joy looks like in the mid to late summer. When everything else is spent or dying, here it is in its full glory. I love the masses of beautiful clusters of pink flowers. It will be fine if there isn't a lot of rain. And, it's also been fine in my yard when the summer is unusually wet.
Drought tolerant and thrives on neglect.
I love how it just grows through the fence. This plant is very easy to grow and a good choice for someone who doesn't like garden plants that are high maintenance. It is fine when it rains non-stop (in well-draining gravelly soil) and also when we are in borderline drought conditions. It's the plant I forget to give some TLC to. This plant is quite drought-tolerant, so no need for frequent watering during hot summers. I only give it a deep watering when it has been very dry. I don't remember to fertilize it either. But, it still grows beautifully and puts on a wonderful flower show in the summer & fall.
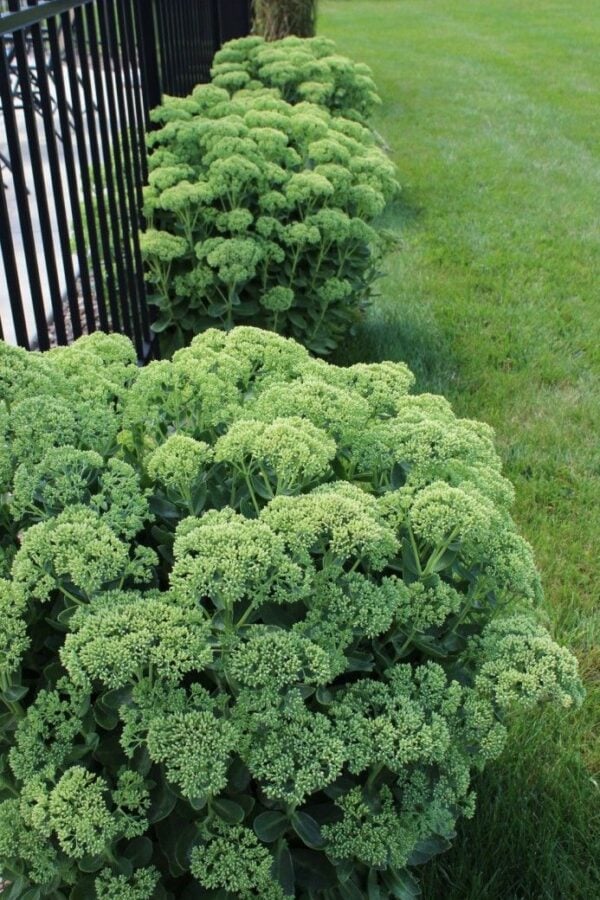
In the mid-summer (kind of mid-July and August), here was what my autumn sedum looked like. I just love the shade of green that the flowers are. I do like the monochrome color before this stonecrop changes color.
As other plants start to fade at the end of the summer, this one just starts getting ready to provide a pretty show of color. The leaves don't droop and they aren't all nibbled on by bugs and slugs like many plants are at the end of the summer/early fall.
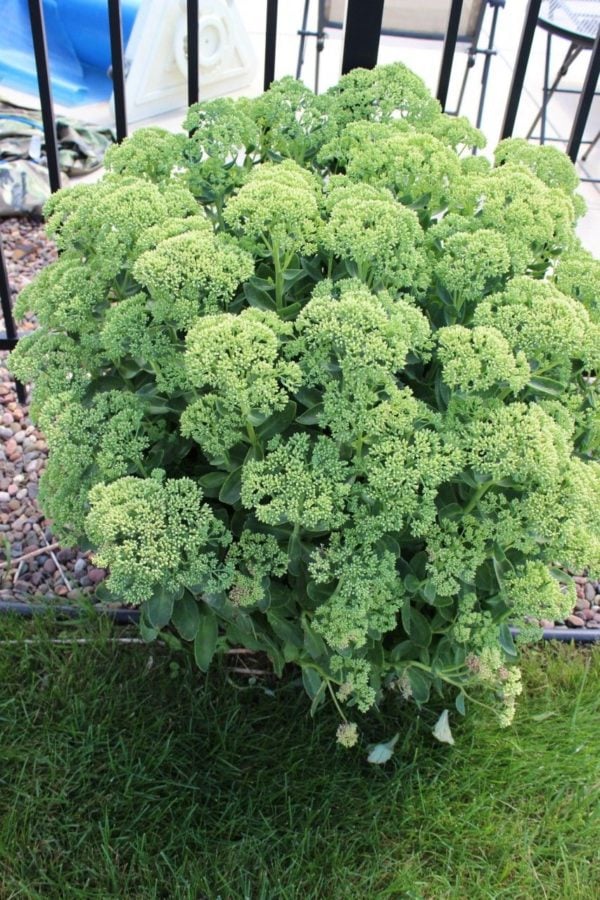
Autumn Joy Sedum in the early summer.
Just prior to it turning to its beautiful summer color, this is what it looks like. A great description of the early summer flower buds is that it looks like broccoli!
Sun requirements
Officially, this plant should be grown in full sun. Or at least partial. I, however, had so many young plants last year that I put a few in partial shade and even heavy shade areas. They did well. The sedum plant didn't grow as big nor flower as much when in heavier shade but was still a very attractive plant. The green is very pretty in the darker, shady areas of my garden. And it still bloomed nicely. If you find your autumn stonecrop is not flowering at all, it may have too much shade and it may need to be relocated to a sunny location. I actually just keep some in very shady locations knowing it won't bloom and think it is a pretty and popular groundcover. That's inexpensive to do if you propagate plants yourself.
Mature Size
Once the plant is fully grown, it is between 1 ½ and 2 feet round. As it gets older and needs to be split, the sedum stems tend to flop to the outside and there is a bare spot in the center. The best time to split this plant is in the spring. However, I've done it at all different times (even in the hot summer). If transplanting when the weather is hot, that is the only time it needs some babying with a little extra water for the first couple of weeks.
This plant stays manageable, not spreading into everything else. It is neat and contained. But, if you want to have more plants, just take one and split it into 3, 4 or if it's a big plant even 5 or 6. If you split it in the summer, it will look a little sparse the first year but when it comes up the following spring, it has its beautiful shape. They just seem to do well no matter what you do with them.
Soil Requirements
Well-drained soil is what this autumn joy stonecrop needs. It will do well in sandy soil. That's one of the reasons it's called a stonecrop - it does well in sandy and even rocky soil. I also have it in richer soil. It almost seems to do well everywhere with the exception of soggy areas.
USDA hardiness zone
The USDA growth zone is 3-9 for this easy-to-grow perennial.
Once the plant is established and bigger, the flowers can start to flop and don't look neat. What I tried this year is to pinch back the growth around July 4th. That seems to be the day my local gardening friends recommend. When the autumn sedums grow back, they grow back fuller and not as tall. It keeps that neater look! I'll have to share pictures of that next year!
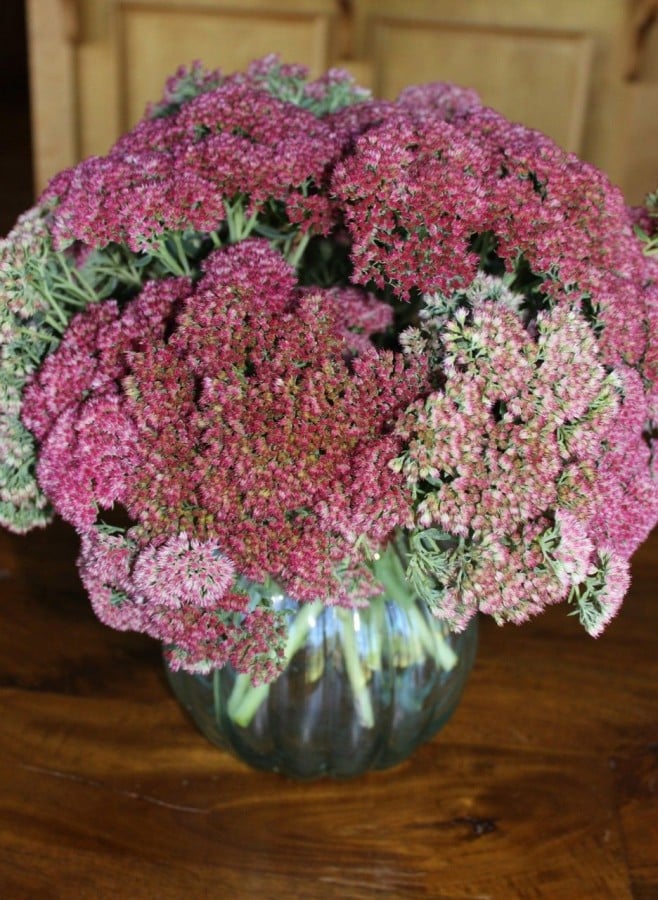
Drying Sedum
I took some stem cuttings and brought them inside. Beautiful! I do something that you might find unusual, but I do this with all the flowers in bring in to dry. I give it a quick spray of hairspray while they were still outside. It just stops the little bits from falling on my counters. Just make sure you like how the hairspray smells before you spray and bring in your flowers! That little hint comes from personal experience when I bought a cheap hairspray specifically to spray my cut flowers that I was drying!
At my last house, I have a ring of sedum around my lamp post. I just like the look. Have I told you I think it's pretty AND it's easy to care for?
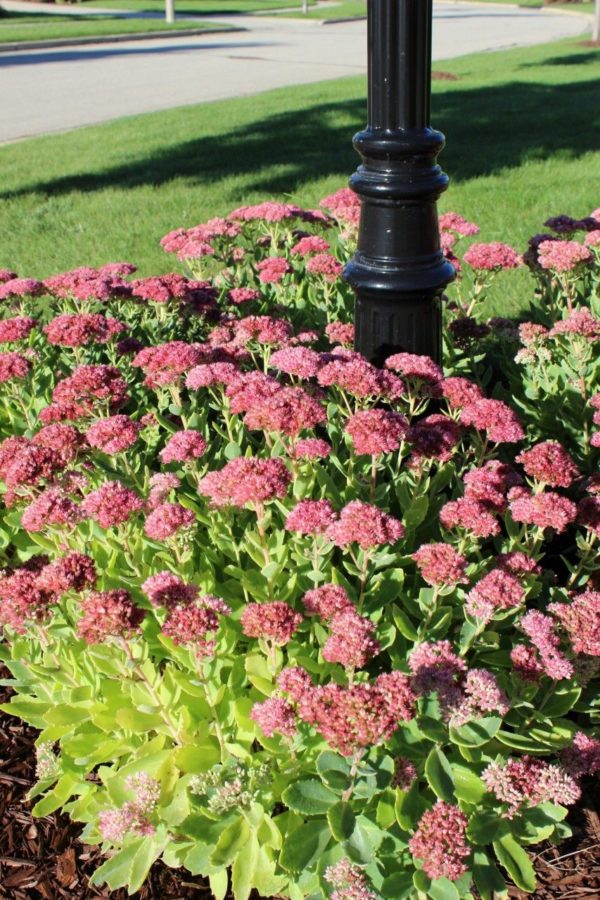
This is one of the few perennials that I don't cut down in the winter. It dries and still has height, definition, and some color in the winter. I love how it stands above the snow in the winter. What a gorgeous all-season plant!
Sedum Propagation
A few weeks ago a friend was redoing her backyard patio and had over a dozen autumn joy sedums that needed to go. Off with my wheelbarrow, I went down the road to her house, : )
These plants are so easy to transplant, you almost can't fail! Make sure to work the soil a little, plant, and water regularly for a few weeks to get the plant established. Then this plant will survive on neglect!
As I brought the plants home, quite a few stems broke and I ended up having unintentional cuttings.
Dividing Autumn Joy Sedum
I wanted a bunch of plants so I divided the bigger plants. All you do is take a spade and split the roots. I also have a large steak knife that has been pressed into garden duty. Smaller plants can just be divided by cutting the roots apart. The shape may look a little odd the first year but, the following year, they regain their nice rounded shape. The best time of year to do this is the spring. But, I've done it from spring to early fall (leaving enough time to let the plant establish) and they've all done well!
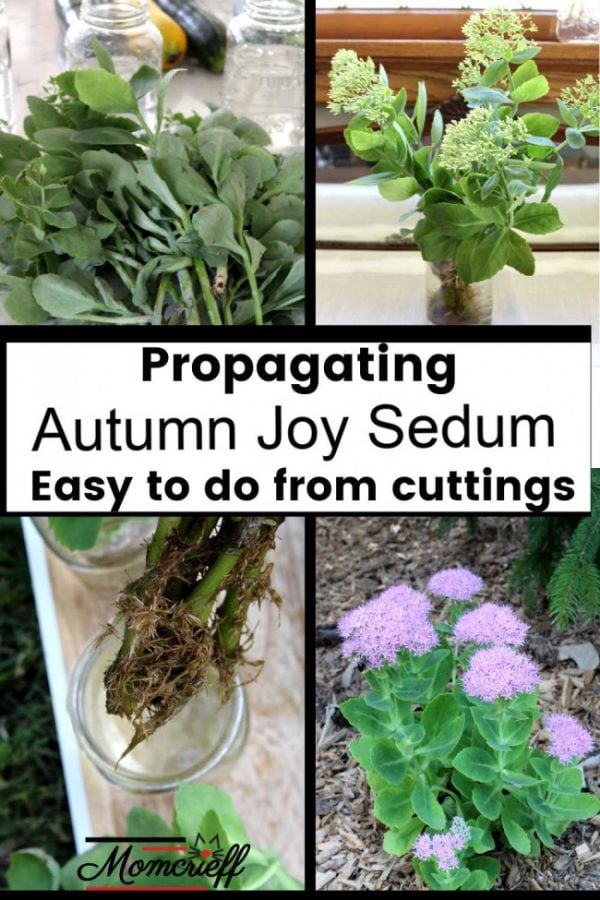
Propagating from cuttings.

I used those unintentional cuttings to create even more plants. As I brought a wheelbarrow full of plants home, some of the stems broke.

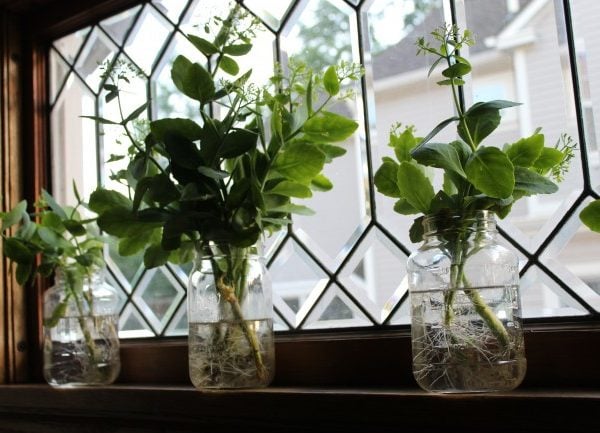
I took a few leaves off of the lower branches, put them in a mason jar and placed them in a sunny window.
My dining room window is original to the house. It's 100 years old and a beautiful leaded glass! It's a great place to root sedums.
Planting my Autumn Sedum Joy cuttings.
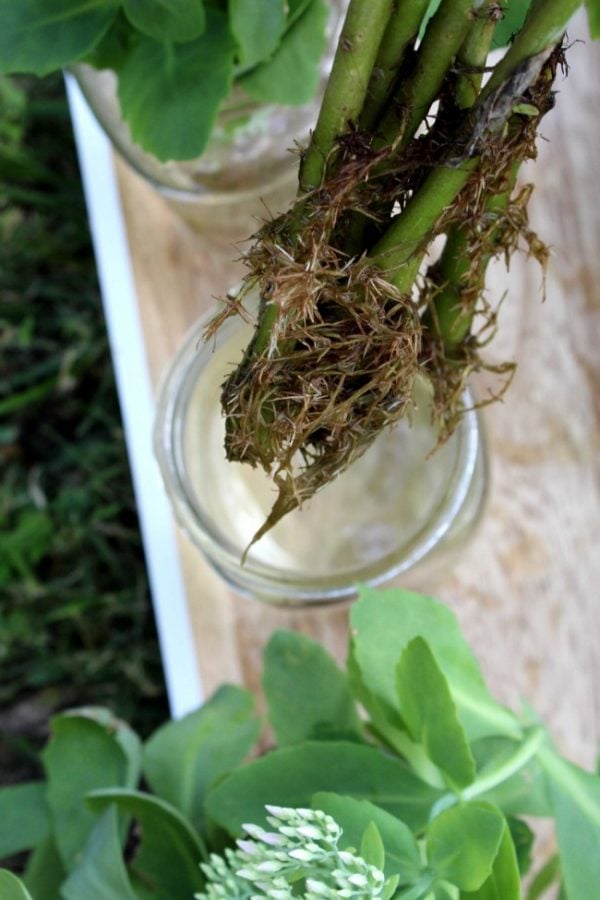
After about 2 to 3 weeks, they are ready to plant. I waited a little longer because it was just so hot and it's easier on new plants when the weather isn't really hot or really cold.
I dug a hole about 3 times bigger than the stems. Then loosened the dirt around that hole. Then I just put in the rooted cuttings.
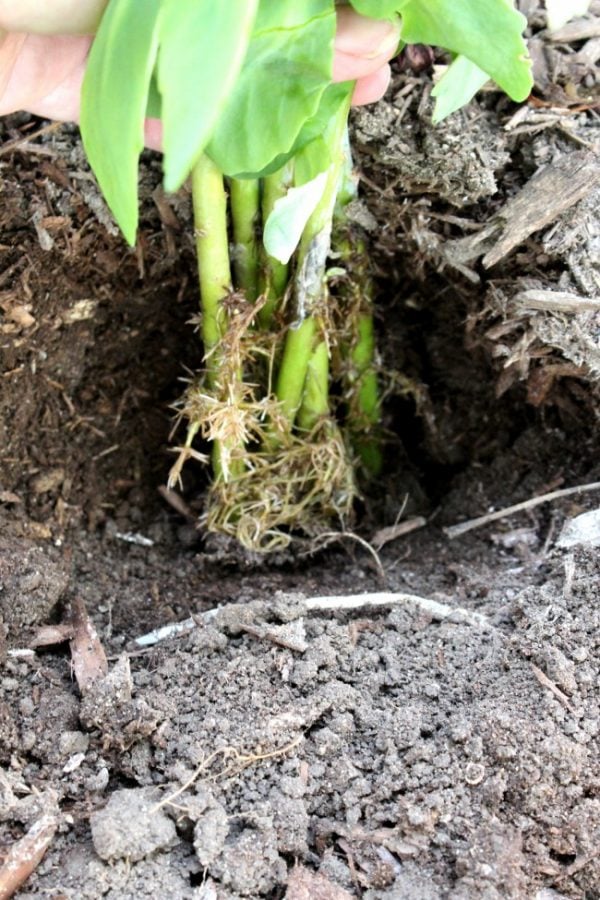
I added soil around it and packed the soil down tightly. Then I watered this newly planted rooted cutting. I tend to baby my new transplants for 2 to 3 weeks. I watered them roughly every 2 to 3 days, depending on how warm the weather was. It's been about a month and they look happy!
This plant looks different from the autumn joy plants I've always had. I love it.
Hope you love this plant as much as I do. If you are looking for a new plant for your garden, this is a great one!
Autumn fire sedum
Just a quick update. I've been hearing about autumn fire. This is supposed to be an update on the traditional autumn sedum. The benefits of the improved plant is stronger stems, larger flower heads and a longer bloom time.
A personal note - I'm perfectly happy with my plants and won't be updating!
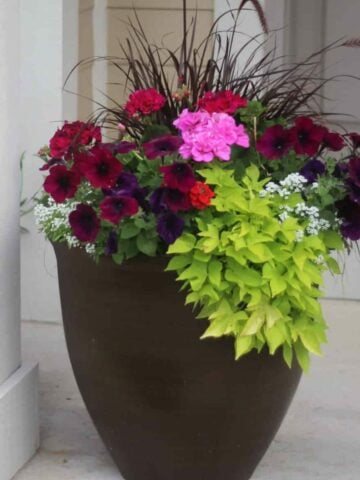
Fall use in a planter
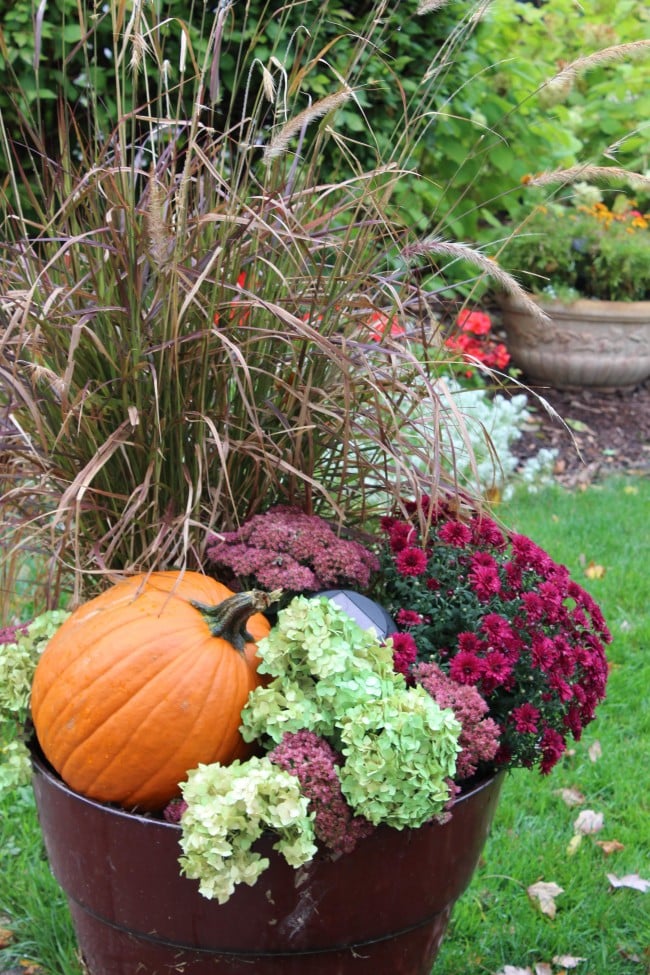
Just an FYI, I have been using fall cuttings in my outdoor planters. It's a way to cut down the cost of fall planters and keep them nice and full-looking. Read all about how I reuse stuff from my garden when creating fall planters on a budget.
It does need to be divided very 3 - 4 years or the plant tends to get floppy. Some plants do just naturally flop. Pinching off ½ of the growth around July 4th helps keep the plant smaller with less floppy.
I love Hens and Chicks, which are low-growing succulents growing in front. Thickseed Coreopsis, which has pretty yellow flowers is a pretty contrasting flower.
Love succulents and sedums? Take a peek at my
**First published Sept. 30, 2020.


Alison
How far apart do you plant them? It's not mentioned. Thank you!
Gabriella Zanoni
Noi in Italia la usiamo come pianta medicinale,infatti le foglie private della pellicola sottostante sono dei potenti cicatrizzanti si usa per le ferite ,per le ulcere venose, per le scottature sia da fuoco che da sole,per levare dalla pelle le spine o le schegge. Si spella la foglia sì appoggia alla ferita e si ferma con una benda ,si cambia la foglia ogni 12 ore. Le foglie raccolte durante la fioritura possono essere congelate e tirate fuori al bisogno sempre togliendo la pellicola sottostante.
Susan Moncrieff
Thank you for sharing the medicinal uses, you have used this plant for. I didn't know it can be used like that!
Barbara Wright
Your article is informative with many useful tips on planting and caring for Sedums. I am anticipating adding Autumn Joy to my flower garden as soon as my local Lowe's or Walmart receive a shipment.
Amber
Great post, I near love this plant!
Sally Wolfe
Hi, Momcrief! Just had to write because I am so inspired by your article about autumn sedum and I love how you have them along hour fence. So now I'm going to take some cuttings of my 2 pretty good-sized ones and hopefully get them in the ground before october hits in Olympia, WA where I live: long rainy season, short growing season. Here's a picture of dry Annabelle hydrangea and spring blooming lupin.
Charles Bowles
I stick cuttings directly in the ground and forget them. Most root and keep on growing. Question Is full sun best? Shady areas they seem tall, lanky and lack volor
momcrieff
Most Sedums do prefer full sun. But, my personal experience is they can do ok in shadier areas. They will get a little lankier in shadier spots.