This is the question I've been asked to most about all the renovations & remodeling done in my 1920's home. The previous owners ripped out the old carpet (I've heard it was moss green shag) to expose the wood floor prior to selling the house.
Did you refinish your hardwood floors?
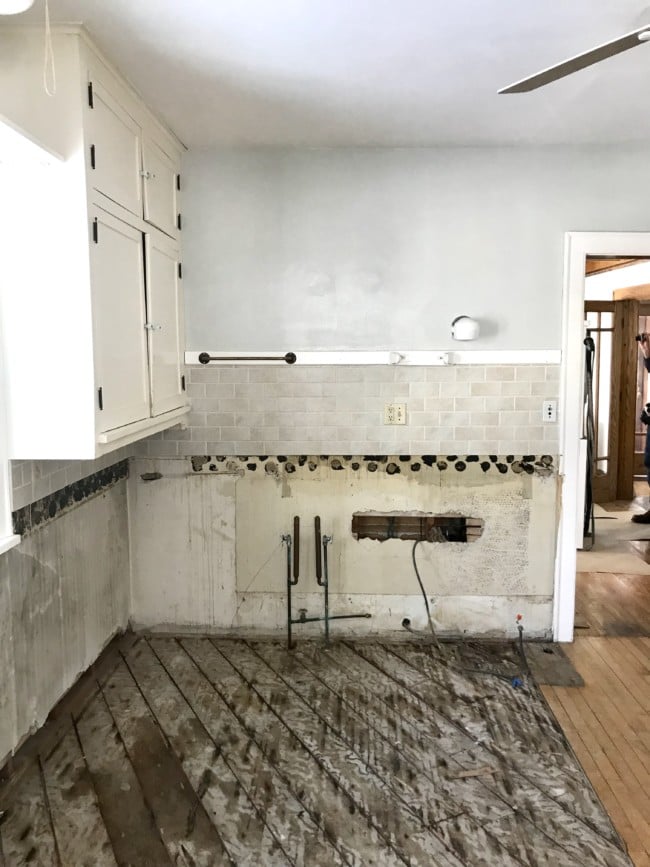
Do you mean this kitchen floor that had been ripped out because the kitchen flooded?
What you see here is mainly still wet subflooring and the original maple floor that was common to kitchens at the time. Maple was considered a cheaper product at the time so it was used in areas guests wouldn't see. Areas like the kitchen or the upstairs bedroom area.
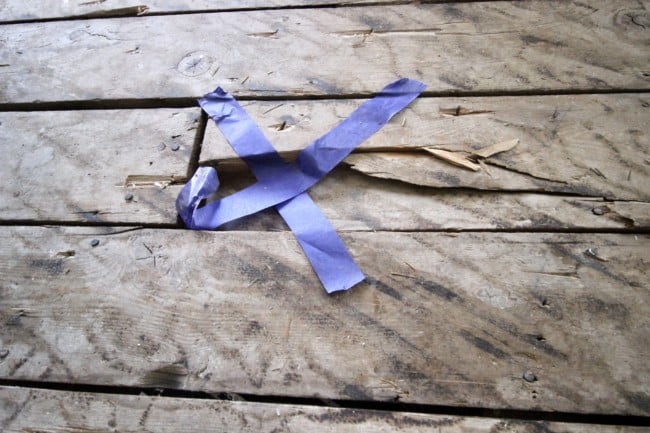
Below is the floor board, everyone stepped on. And I kept panicking because I thought the board would break and that someone was going to end up falling through to the basement. I marked it so people wouldn't stand on it and it seemed to attract people! I was always asking people to step away from that section.
I told my contractor that as soon as I closed on the house, the absolute very first thing I wanted him to do was fix this floor!
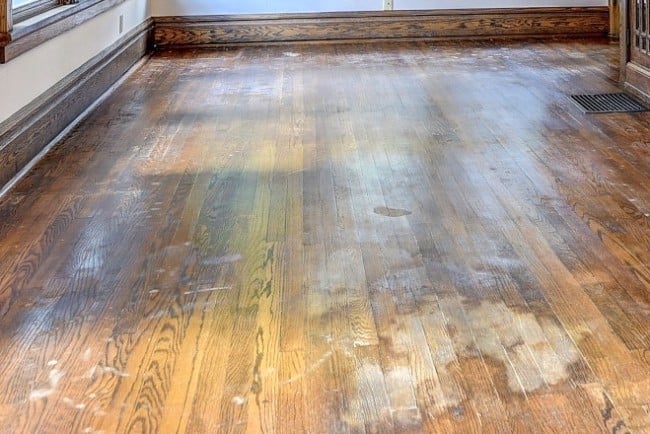
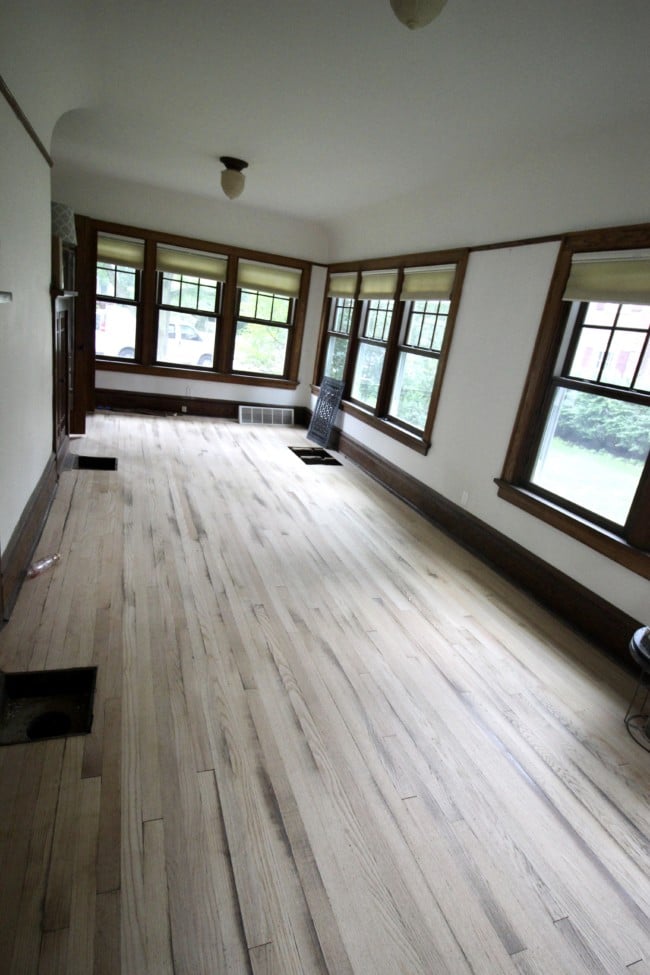
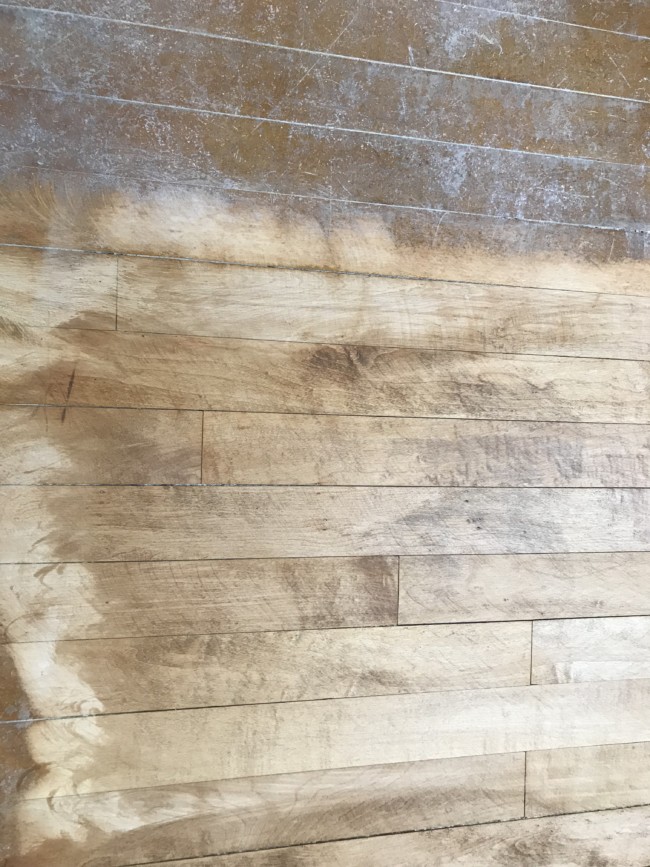
This was the original old wood floor (in the sunroom), with scratches, a ton of water damage, and some residual glue from the moss green shag rug that apparently covered these floors for decades.
I was thankful that the original carpets had already been removed. But, the required repairs were way above what I would have been able to do in a reasonable amount of time.

I honestly don't think I could have seen past that carpeting. Let that sink in - moss green shag carpet.
But, that carpet protected this floor, in some ways. My hundred-year-old home had floors that had never been refinished. I was very concerned and very hopeful that the numerous patches of water-damaged hardwood floor could be refinished. Fortunately, there weren't many deep scratches.
There was no turning back once I owned this house!
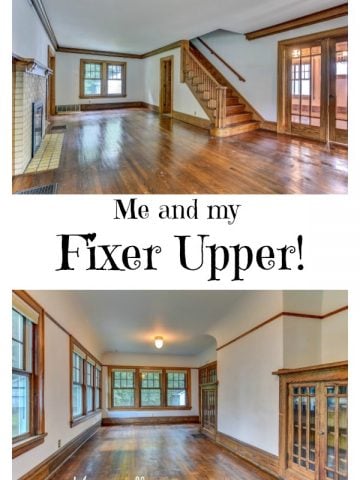
Sometimes I still can't believe I bought this house in the condition it was. My life was a mess. This house was a mess. I guess we needed each other : ). I did write a post at the beginning of my fixer-upper journey. Warning! One of my besties called me to complain that it made her cry.
New Beginnings. Me and my fixer-upper house.
Refinishing Hardwood floors in my vintage home
Refinishing the floors was the absolute last thing that was done of all the remodeling projects. It was probably the project that was the most nerve-wracking for me. I had so much hope that the floors would turn out but there were no guarantees. The floors in the WHOLE house were being refinished! Every single room, except the bathrooms which were going to be tiled, were going to be fixed, patched and a uniform new finish but on! The different colored stain in each room was just weird.
Choosing stain color for my vintage oak floors
For some reason, I originally didn't realize all the floors on the main level were oak with the exception of the kitchen! I guess it's because I had once lived in a home that had that clear, shiny orangy oak colored floor. It never occurred to me that these floors that I had fallen in love with were actually oak.
I had spoken with the wood finishing sales guy about wood stain colors. I had told him I was looking for a brown similar to what the living room looked like. Because the color was what made me not realize the floors were oak!
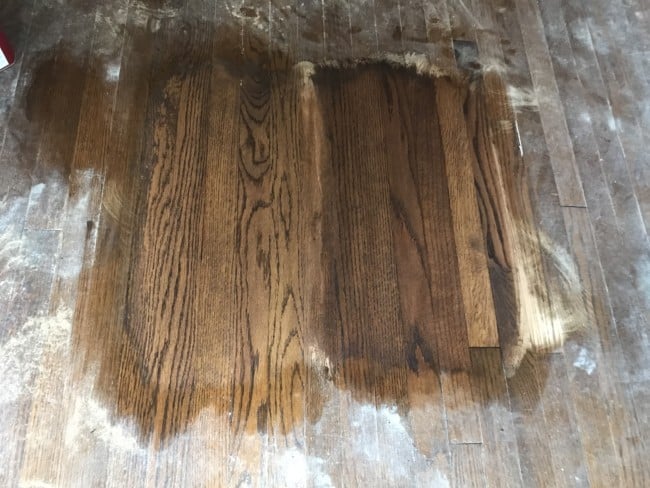
When the floor guys came to start, they took the big orbital sander and sanded a big spot in the living room near a window. We had good light to see the stain colors on the actual floor. They used the applicator pad of the sander to show me the nice consistent finish I would get when they were done.
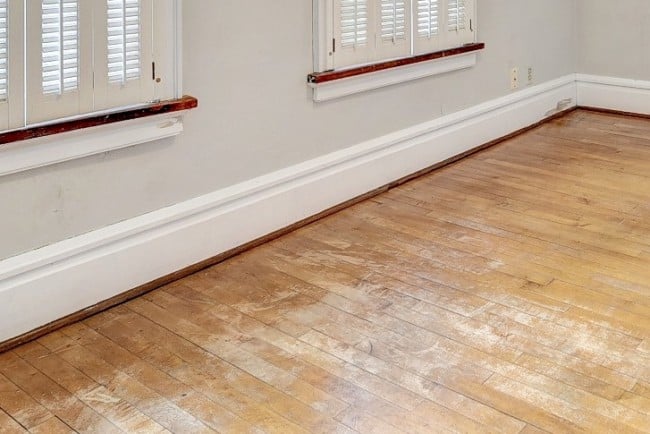
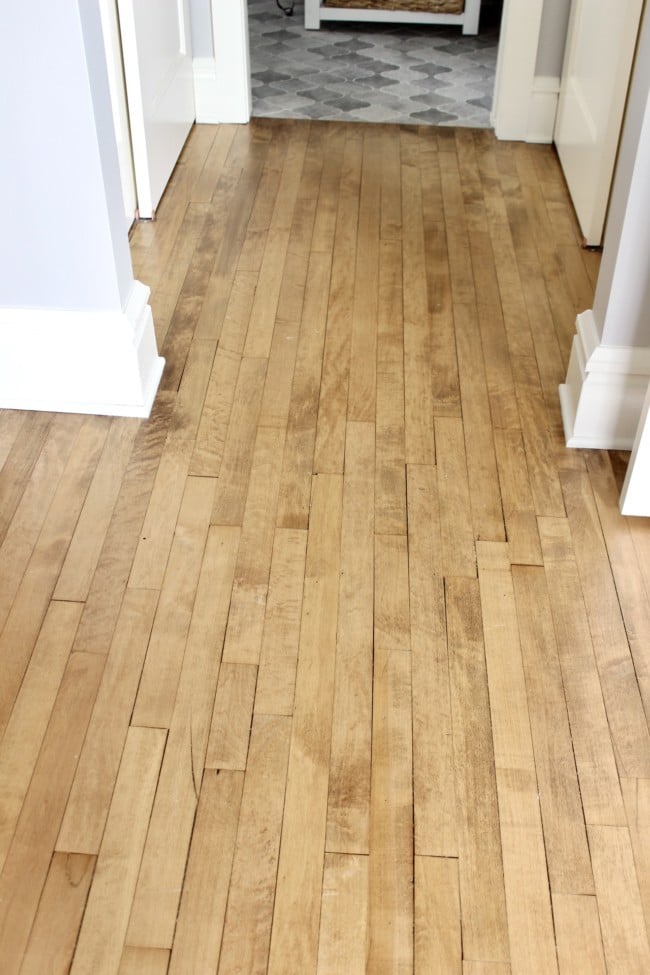
I loved the stain on the left. I wanted the whole floor on the main level stained the same color. Originally, every room had a different color stain. Below is my little front entryway to my home. Look at the bottom of the picture to see how the stain changes from the living room to this little entryway room.
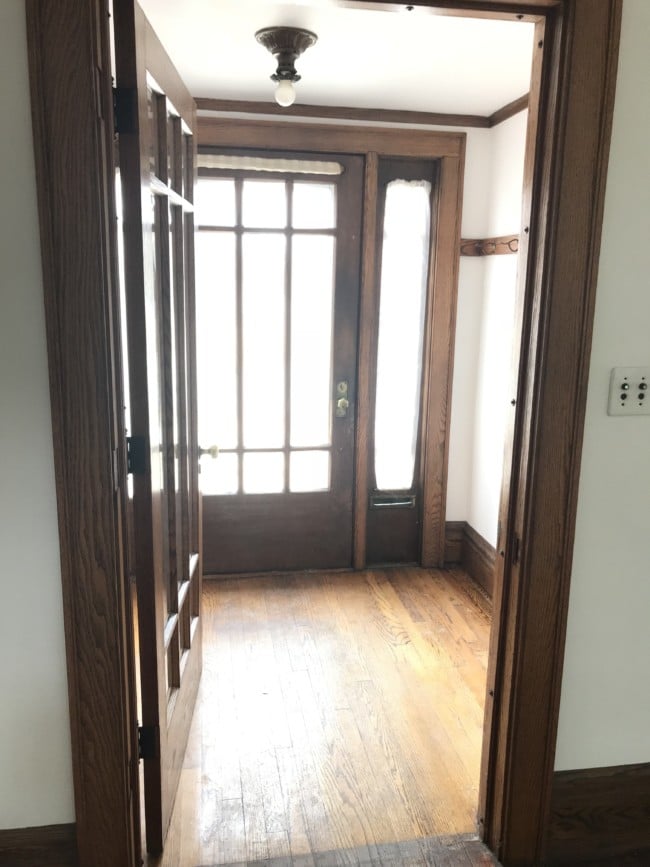
See the dark stained living room floor, then the orangy stained entryway at the bottom of the above picture? That's why I was determined to stain the whole main floor one color. I wanted the floors to look more cohesive and not have your eye catch the line of where the stain color changed.
What stain colors did you choose for the main floor?
But back to my stain color. Once I saw the stain on my floor, it was an easy decision for me. I was trying to match the period of the house, use a stain color that would look good on the whole main level, wasn't too dark and, was browner but not orange. The stain I chose is made by DuraSeal and is called Antique Brown. Just the name sounded fitting for my vintage home! It was an Infinity Satin finish made fy Glitsa.
Fixing my hardwood floors - Replacing the kitchen & joining old and new flooring
Let me show you some before and afters. Basically what the floors looked like. My kitchen originally had maple floors in it. That was because when the house built, you put the nice things in the rooms other people would see. The kitchen was hidden behind a wall. I took out that wall to open up the house. If that process is interesting to you, take a look at My Kitchen Remodel.
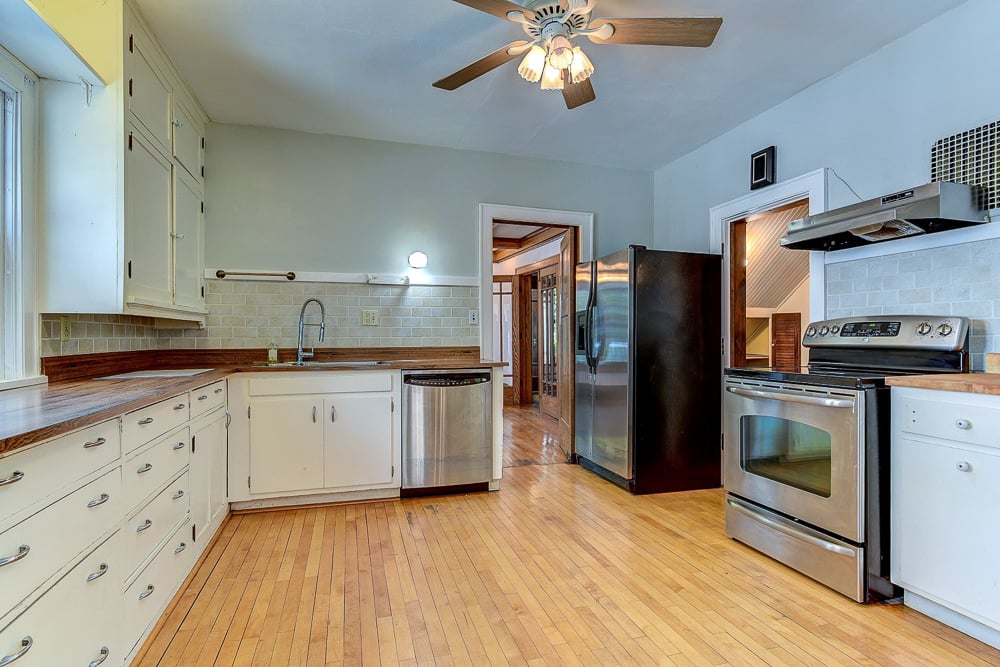
This is what the kitchen originally looked like with the maple floors.
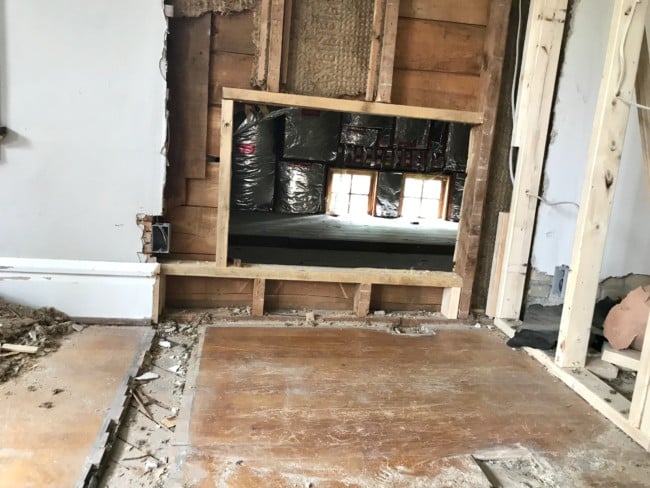
Unfortunately, there was a flood and I bought this house when the floor looked like the picture below. The lower cabinets and the floors were removed to prevent mold.
I mentioned before that I wanted a uniform look with the floors throughout my house. I decided to replace the kitchen floors with oak, like the rest of the house, not with maple that had originally been in there.
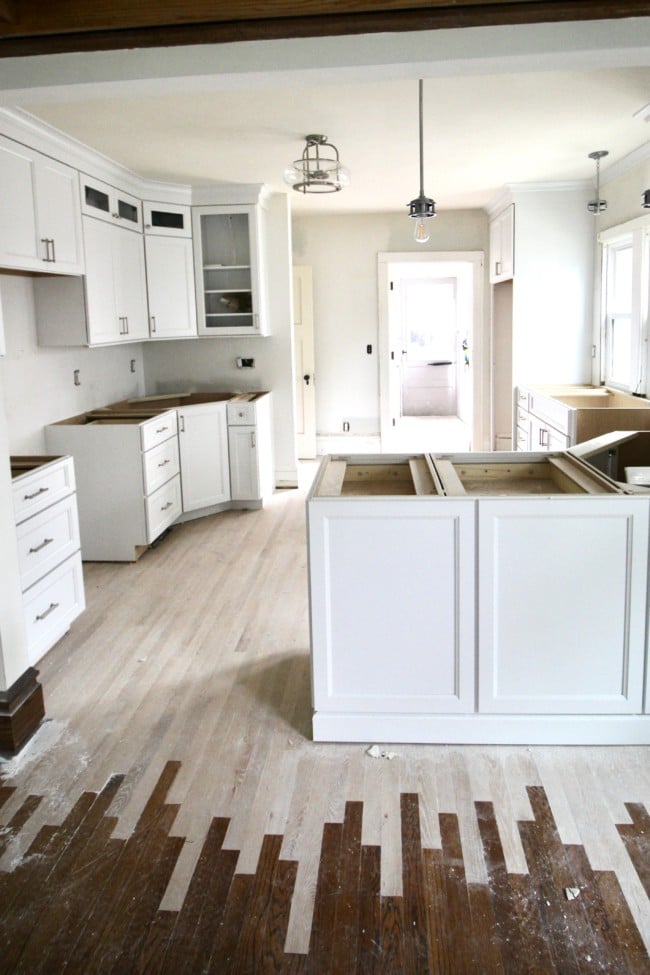
Not only did I change the floor, but I removed the wall between the kitchen and dining room. In the picture below, you are looking from the dining room into the kitchen. The wall in the above picture was removed. But, focus on the floor!! The flooring guys brought in new oak floors and the technique to join them was called 'feather them in'. So, there is no straight line between the old floors and the new ones. They are staggered to look like they were always joined.
And then, this is where I just can't believe what a great job these guys did! Everything was sanded down and refinished. My dining room has 100-year-old floors. My kitchen has brand new floors. I just showed you how they were feathered together.
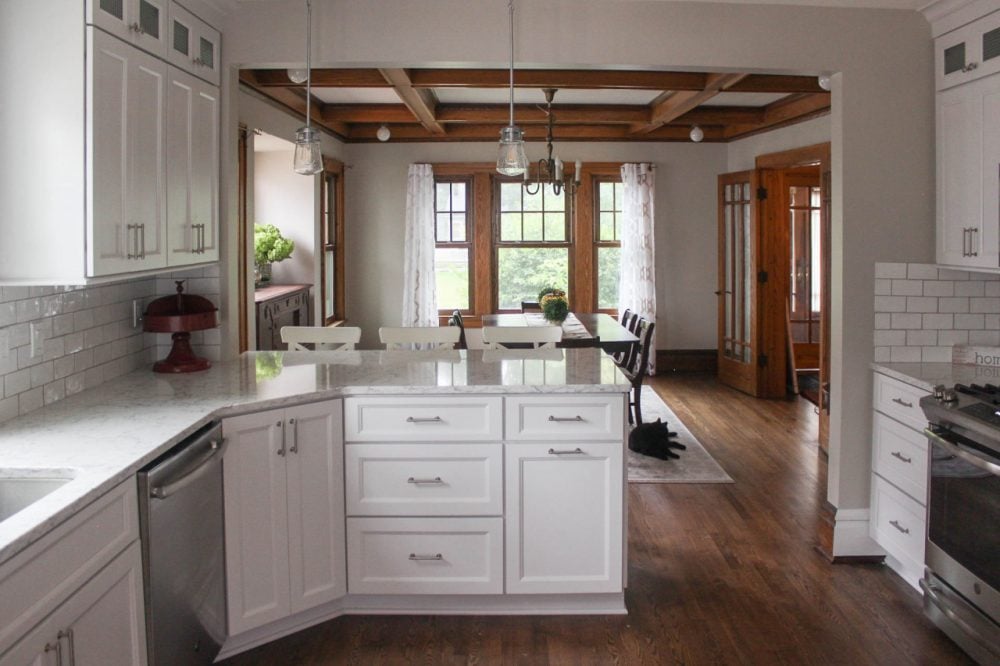
Huh, that would be Raji, my cat photobombing my picture on the rug in the dining room! He's a stinker but I love him!
Every day when I walk into my kitchen, I'm overjoyed. It turned out so well! There's a slideshow in my post showing how the original kitchen was taken down to the studs, the walls were removed and it was built up. If you want to see it, the post is I bought a house without a kitchen.
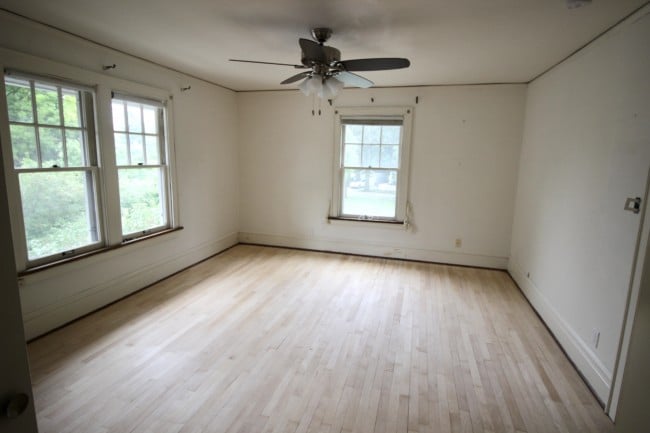
Let me just remind you how my original sunroom floors looked like.
When they sanded the floors, they looked like brand new floors were installed. All the dirt and grime, and the old finish was removed. There were a handful of the carpet nails / tacks on the outside of the room but my floor folks took care of them.
So this is just my main floor! My upstairs floors were also fixed and refinished!
The upstairs floor.
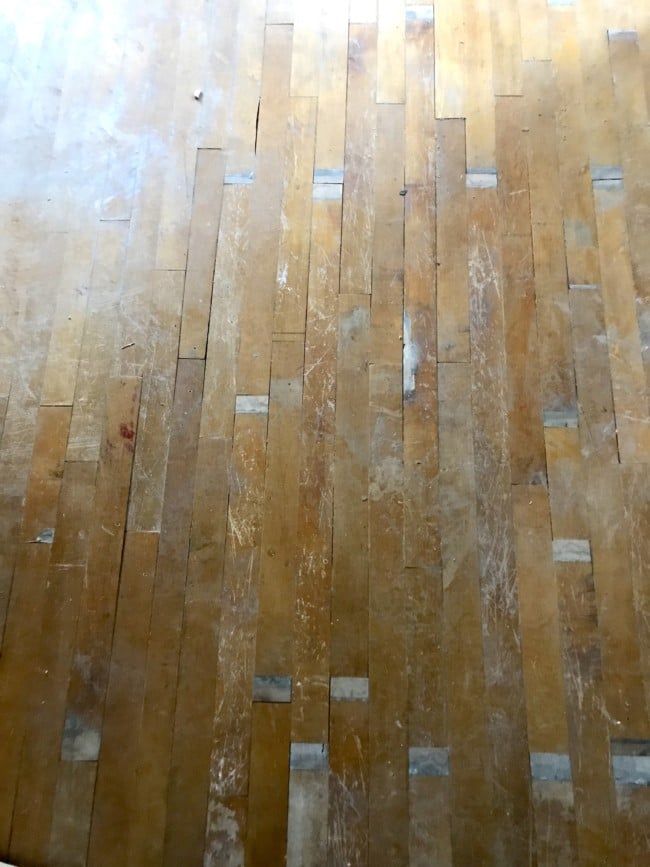
These upstairs bedroom floors were the epitome of orangy scratched and worn. All the upstairs was thin maple, no wide plank flooring in this house!
Did you notice this pine does not have any knots? It's
I actually took the smaller two bedrooms and took out a wall upstairs to make a master suite.
On the floor, in the above picture, you can see where the walls used to be. Oh, and if you are wondering what you are looking into, that's a little attic off of my new master bedroom. Unfortunately, it's only about 4 feet high at its highest section.
My bedroom floors were also patched with some maple that we had saved.
What stain colors did you choose for the upstairs floor?
Choosing the stain color upstairs was a similar process to downstairs. I had already narrowed down that I didn't want the wood to be stained clear, I wanted them to be a very light color. And, I didn't want it to be orange.
A sample area was sanded and then stained with the color we thought was what I wanted.
My maple floors were stained in DuraSeal nutmeg and I used the satin finish (I think it was a polyurethane finish on top) as I did on the main level.
After about a year, here is the same floor area as the top two pictures (just in a different direction).
In real life, the floor is lighter, but I've never been able to capture the color perfectly with my camera. I'm thinking it's a lighting issue since there is no natural light right there.
Was refinishing the floors dusty?
Is the dustless sanding really dustless?
I've been asked about dust from sanding my floors more times than I can count. You can pay extra for dustless sanding. Which is essentially done by using equipment that collects the dust in a bad (kind of like your little sanders). It was phenomenal! I don't anyone will guarantee that their sanding system is 100% dust-free, but, this was certainly as close as you can get. I didn't have dust! None in the air, on the floor, or anywhere else. I wasn't expecting that and it was such a bonus!! If you have a dustless sanding available to you, don't hesitate - sign up for that!!
This is what the floors looked like seconds after sanding. No dust on the floors! I'll have to admit they did have to broom sweep and vacuum corners but overall, there was surprisingly little dust or debris of any kind anywhere!
I was thrilled at how clean the whole stripping and sanding process was! The floors and everything else in my house were dust-free after this process! I'm not sure if that will be everyone's experience but I was amazed!

Thanks for visiting and letting me share how my flooring update happened in my 100-year-old house. Please take a look at more articles in this series.
More renovation | remodeling posts!
I had knob and tube wiring. I updated the wiring in my whole house!
Updating knob and tube wiring in my 100 year old house.
You saw some of the renovations done in my kitchen. See the details of going down to the studs and then rebuilding my kitchen.
I bought a house without a kitchen - come see the renovations!
This 100 year old house has picture rails in almost every room! Here's what they are.
Picture rails - what they are and how to use them
Small bathroom gut and remodel. It's small but functional and so darn cute!
My 5 x 8 hall bath remodel
I also have a blog post on my Fireplace Renovation.
Why I bought this fixer-upper (in the state that it was).
New Beginnings: Me and my fixer-upper
Jillian
The insights provided are incredibly helpful for anyone looking to revitalize their home's flooring. Your flooring looks absolutely amazing – what a fantastic transformation!
Beth
Great love your floors where did you stay while your house was being refinished and how long did it that
Susan Moncrieff
I had purchased the house but hadn't moved in yet. It took roughly a week to do my whole home but there was nothing in the home when the floors were redone. After the final coat on the floors, they couldn't be walked on for 48 hours, then only with socked feet (no moving in furniture).
Mia Tenille
Wow, that 1920's house was most certainly a project! But you saw its potential and it turned out lovely! So sad about the flooding in the kitchen but I loved what you did with it. I recently refinished my hardwood floors in my Cherry Hill NJ vacation home and was seriously SO pleased with the results! We actually live full time in New Jersey and had another company refinish our hardwood floors in our main home in Succasunna NJ and both companies did a beautiful job with it!
Margot
Your floors are beautiful and may inspire me to refinish mine. Mine are about 13 years old and are starting to show wear in some areas. This combined with the fact that my floors are orange (red oak simply finished With polyurethane but I swear they have gotten more orange over the years!). I would love if they could be more the color of your main level floors!
momcrieff
Thanks Margot, for your comments about my floors. I was so glad I was able to get them all done before I moved in. And I do love the darker oak color!
Deana Landers
What a great job! I helped my brother redo his 100 year old floors an I appreciate the work you have done.
momcrieff
There is nothing like the character of a 100 year old house. It's a lot of work to renovate but so very worth it!
Deana Landers
I love your statement of how you needed each other.floor! "Sometimes I still can’t believe I bought this house in the condition it was. My life was a mess. This house was a mess. I guess we needed each other : )"
You did a great job and it looks wonderful especially with the cat:)
momcrieff
My life was a mess but I'm happy and at peace now - hanging out with my buddy the cat : ).
Patti
Wow that's a huge project but so worth it. We've been in our home for 16 years now. Most of the hardwood looked like it was recently refinished when we bought the house. I'm always wondering if it would be a good idea to somehow refresh them. Probably when we are ready to sell which may be sooner than rather than later. Thanks for sharing your journey Susan.
momcrieff
Hey Patti!
I was told that yes, you should indeed have the floor people come out every few years to refresh the hardwood finish on the floors. I don't remember the technical term, but 'refresh' is perfect in my mind : ).