• Skip to primary navigation
  • Skip to main content
  • Skip to primary sidebar

Momcrieff

Recipes | Gardening | DIY | My 1920's house

  • About Me
    • Contact me
  • My 1920's House
  • Recipes
    • Four Ingredients or Less!
    • Appetizers
    • Main Dish
    • Soups
    • Baked Items
    • Desserts & Treats
  • Gardening
    • Spring Gardening
    • Fall Gardening
    • Gardening And Landscaping
    • Planters / Containers
    • Misc. & Chores
  • DIY
    • DIY
    • Valentine's Day
    • Spring
    • Fabulous Fall!
    • Christmas & Winter
  • Misc.
    • Vacations
      • Family Vacation
      • Girl's Vacation
      • Misc. Vacation
    • My Black Cat
    • iPhone/iPad Hints
    • Home Ownership
  • Nav Social Menu

  • Nav Social Menu

    • Facebook
    • Instagram
    • Pinterest
    • RSS
    • Twitter
menu icon
go to homepage
subscribe
search icon
Homepage link
  • DIY & Hints
  • Gardening And Landscaping
  • Planters / Containers
  • My 1920's House
  • Appetizers
  • Baked Items
  • Beverages
  • Breakfast
  • Desserts & Treats
  • Four Ingredients or Less!
  • Herbs - growing & preserving
  • Main Dish
  • Salads and Dressings
  • Soups
  • Subscribe
  • Yum
  • ×

    Home » Misc. » DIY & Hints » Christmas & Winter

    Christmas Ornaments - easy, homemade ornaments.

    Published: Nov 30, 2014 · Modified: Apr 17, 2019 by Susan Moncrieff · This post may contain affiliate links · Leave a Comment

    I saw these all over Pinterest last year. And, pinned them so I would remember to make them for this Christmas. Unfortunately, the pins I pinned, didn't lead to a good recipe. So, I ended up trying a few common recipes for homemade ornaments and will share some helpful tips.homemade Christmas ornaments

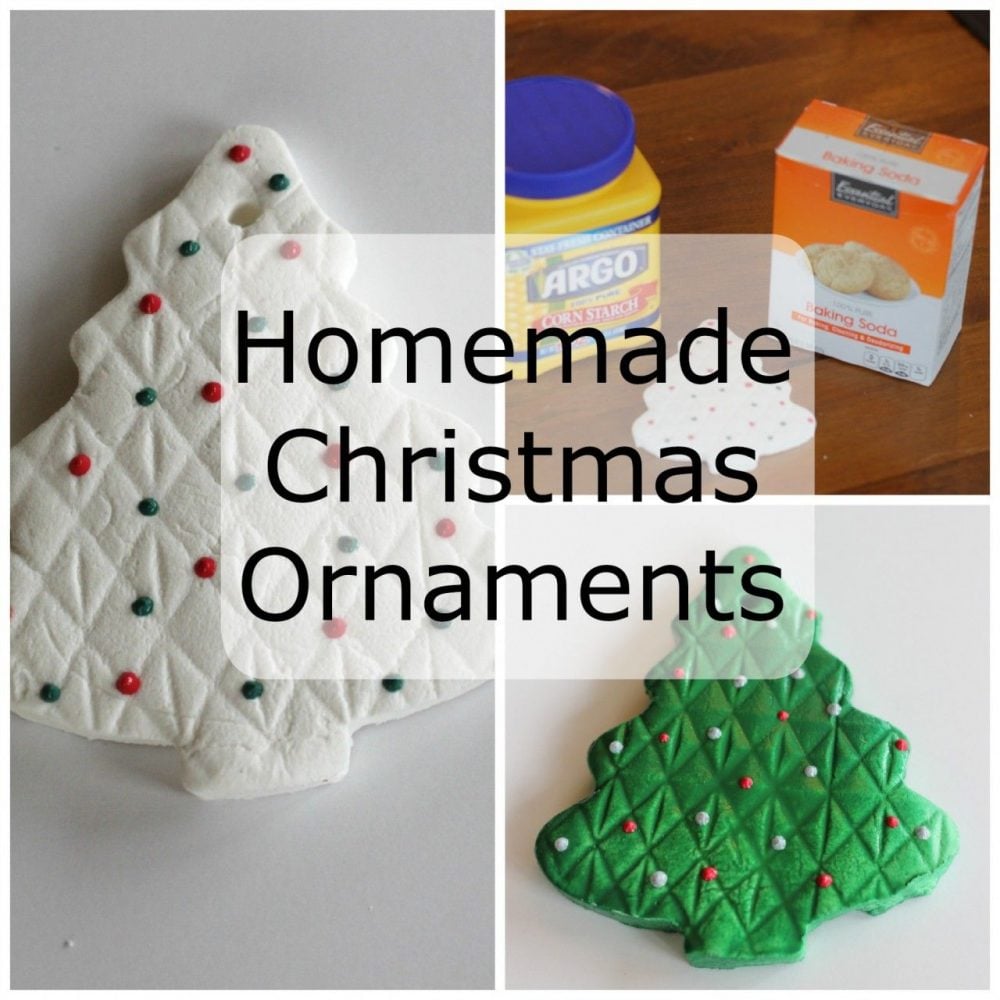
    This seems to be the most common homemade ornament recipe out there.

    Ingredients:
    2 cups baking soda (one small box - 1 lb)
    1 cup cornstarch
    1 ¼ cups cold water

    Directions:
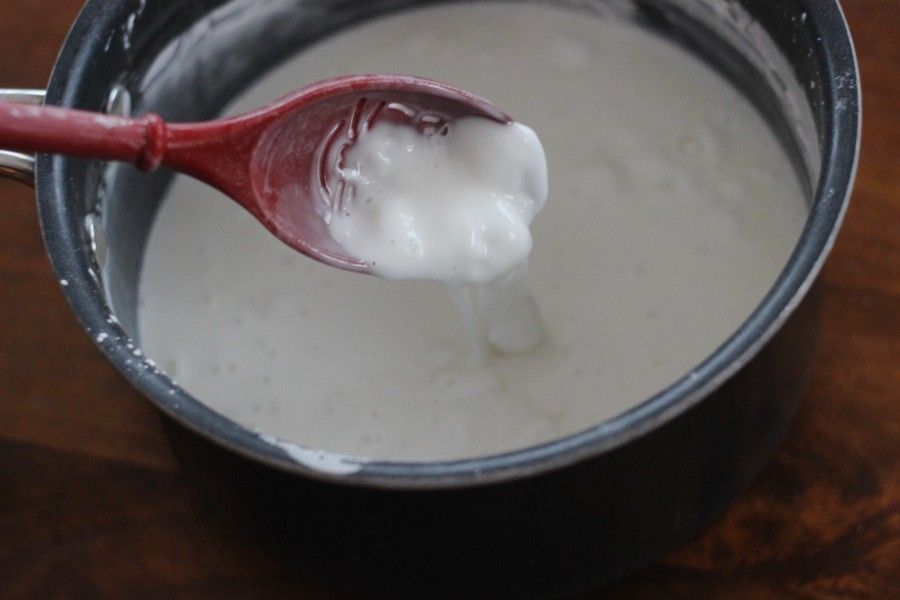
    Mix together the baking soda and the cornstarch. Then, add the water.
    Stir together well.
    On medium heat, keep stirring. You can't stop stirring or it doesn't come together well. But, it comes together in a few minutes. In the beginning, it looks like this:
    Mixing ingredients for homemade Christmas ornaments
    In a couple of minutes, it gets lumpy.
    Mixing ingredients for homemade Christmas ornaments
    Keep stirring. Then it starts to solidify and looks like mashed potatoes. Make sure you get to this stage but don't overcook.
    Mixing ingredients for homemade Christmas ornaments
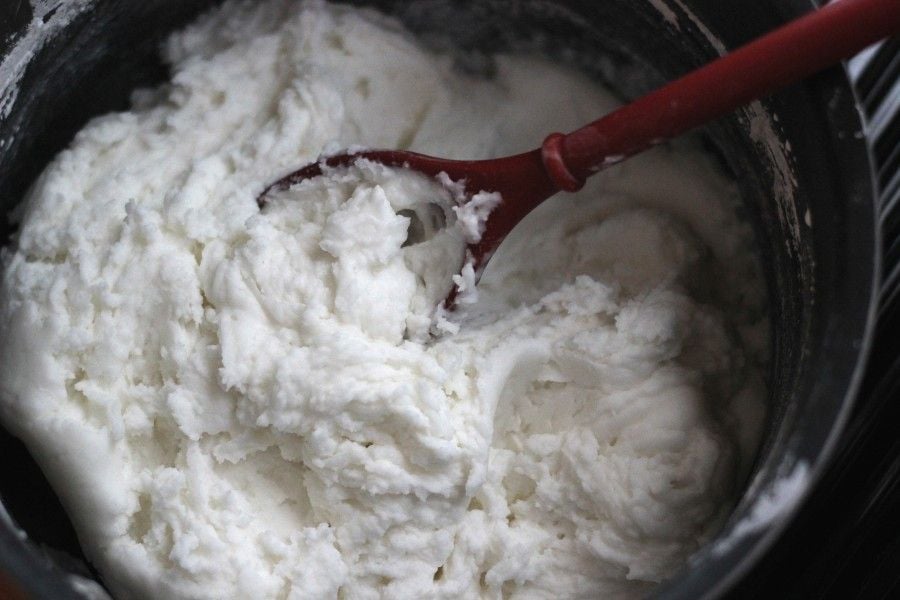
    Now, dump it onto a plate and spread it out. This is so it can cool. Place a damp piece of paper towel on it, to keep the dough moist. NOT wet. That adds too much water to the dough and then you end up with a sticky mess.
    homemade ornaments
    After about 5-10 minutes, it should be cool to the touch. Knead it a few times and it will feel smooth and soft.  If it is sticky, let it sit for a few minutes (covered with the barely damp paper towel - you want it to dry a bit).
    Roll out on parchment paper. I liked the end result of about ¼ inch thickness. Many recipes suggest ½ inch thickness but personally, I didn't like that size. It just made the ornament seem to chunky.

    Using a cookie cutter to cut out an ornament
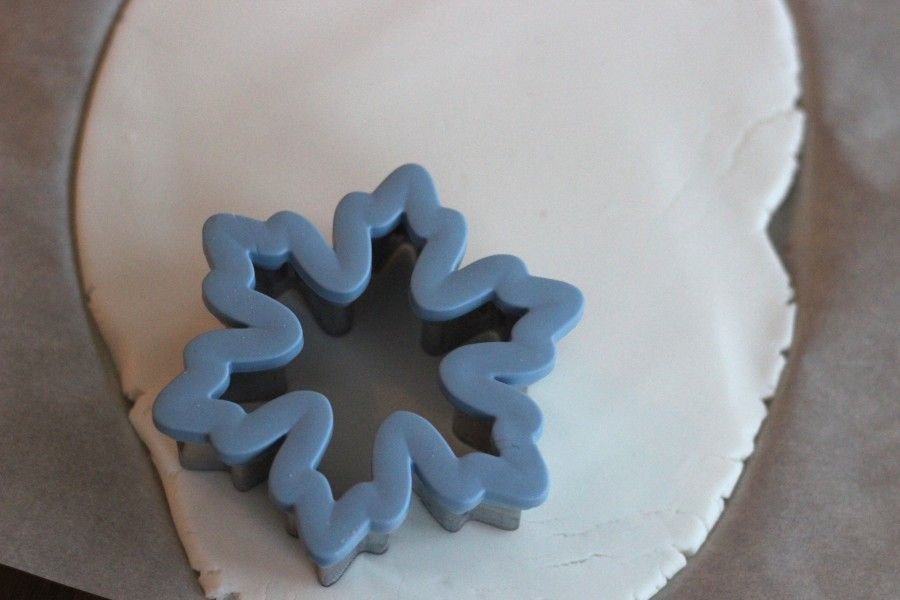
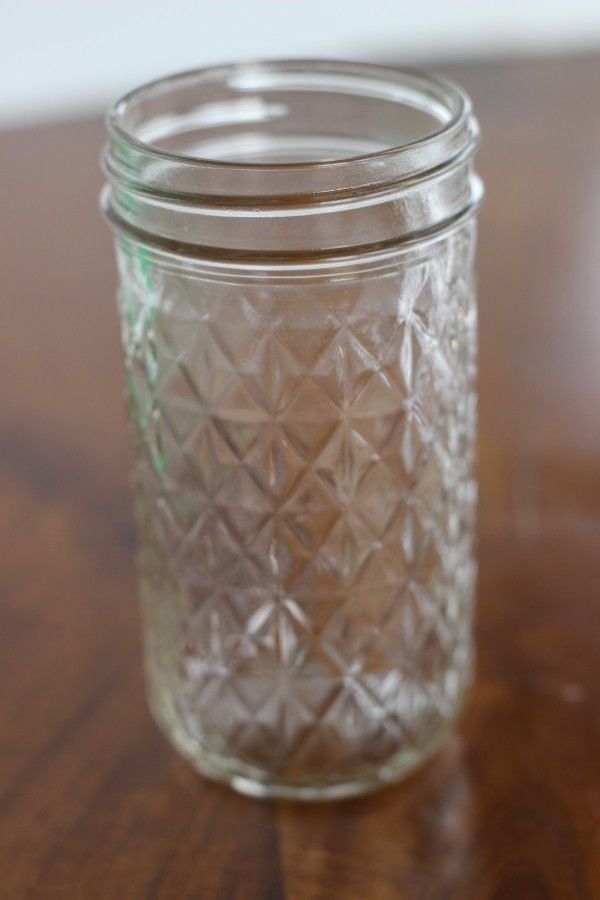
    If you would like to add a texture pattern to the dough, now is the time. I actually just used a jelly jar like this to make a nice pattern.
    A mason jar with a nice pattern on it.

    Newsletter Signup
    FREE SIGN UP

    Want to create your own DIY beautiful planters? I'll be sending lots of ideas and inspiration. "How to plant" tutorials & planter care tip articles will be shared too!

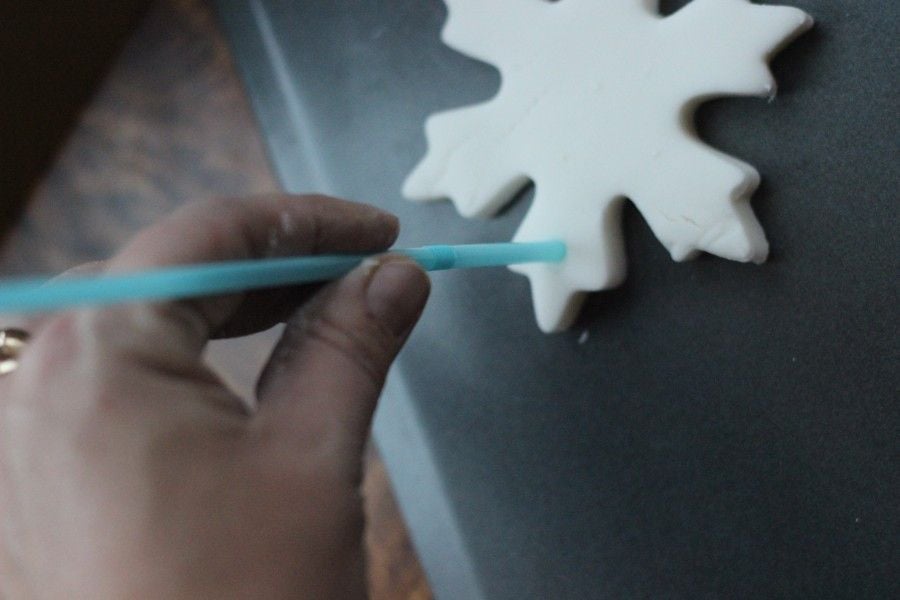
    Don't forget to make a hole so you can hang your homemade ornament.  I just used a straw.

    Using a straw to make a hole in the Christmas ornament
    How to dry these was another area where many recipes seemed to differ.
    Personally, I liked the look of the naturally dried ornaments better. If you bake at 350 degrees for 15 minutes, like some recipes suggest, they brown.
    The finished baked ornaments
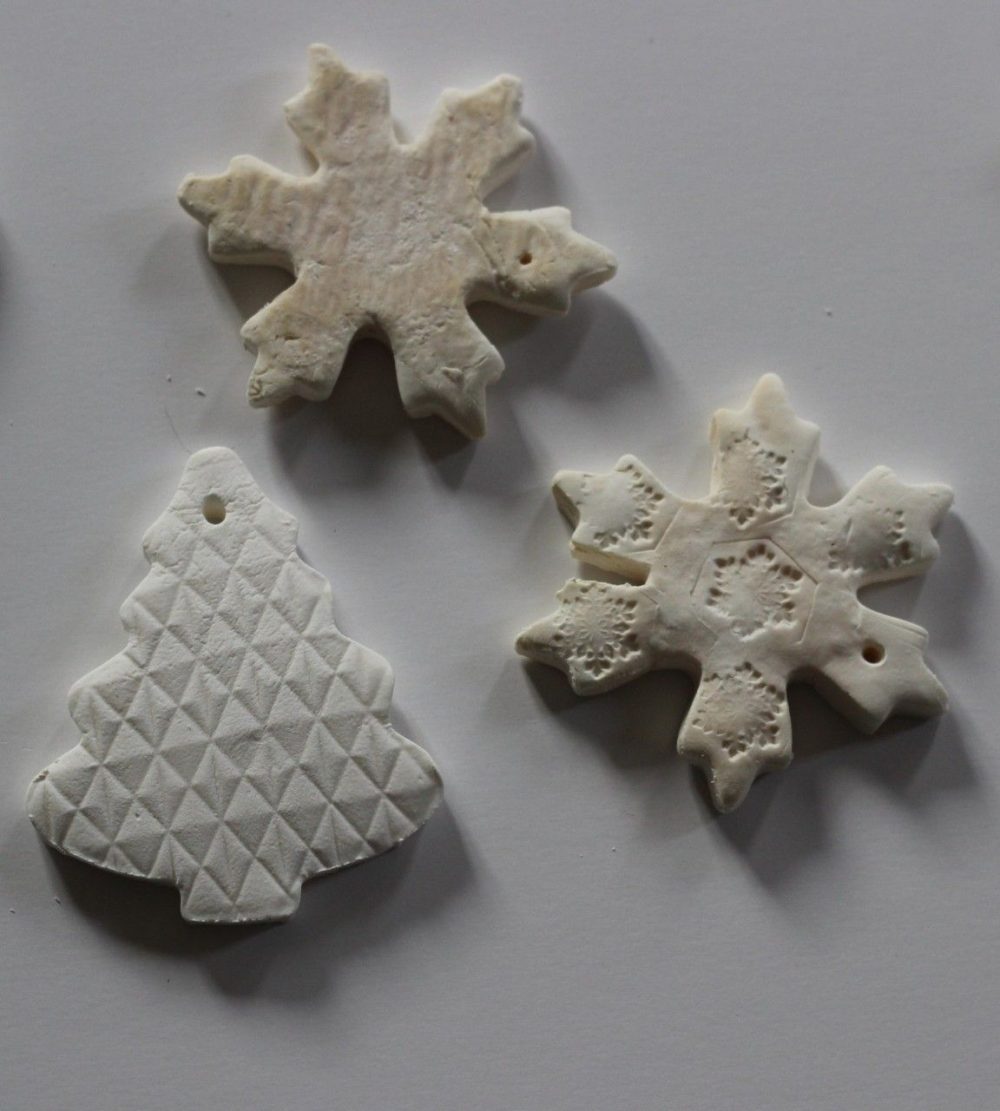
    See the above snowflakes? They were baked. The tree was allowed to air dry. I did put my tree batch into the oven at 100 degrees (dough proof temp). for an hour, turned the oven off and let them dry overnight.
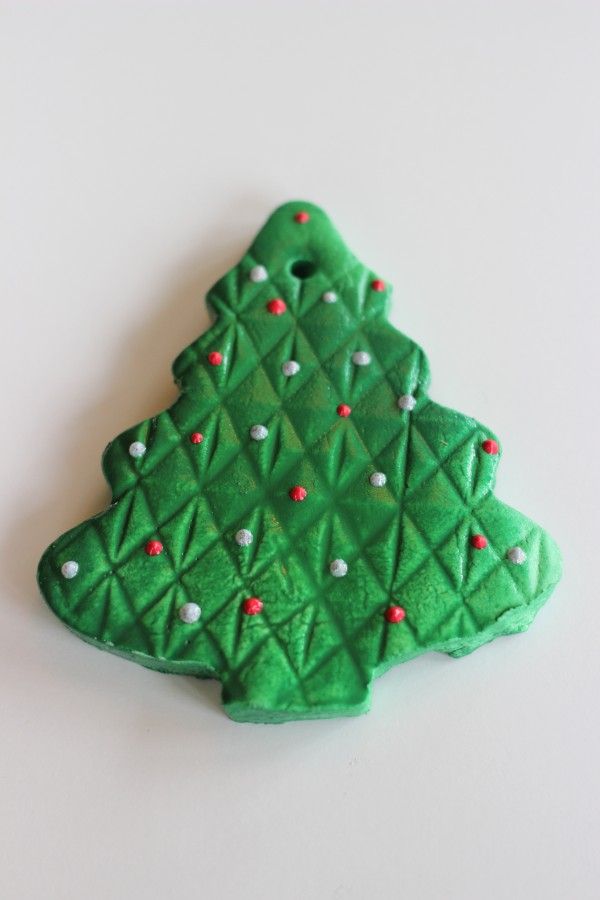
    Also, if you look at the Christmas tree, you will see the pattern from rolling the jelly jar on the dough.

    I did find the air-dried ornaments were more fragile than the baked ones.  I tried spray painting the ornaments. The green spray paint looked great but the white ended up looking 'blueish'.
    homemade Christmas ornament
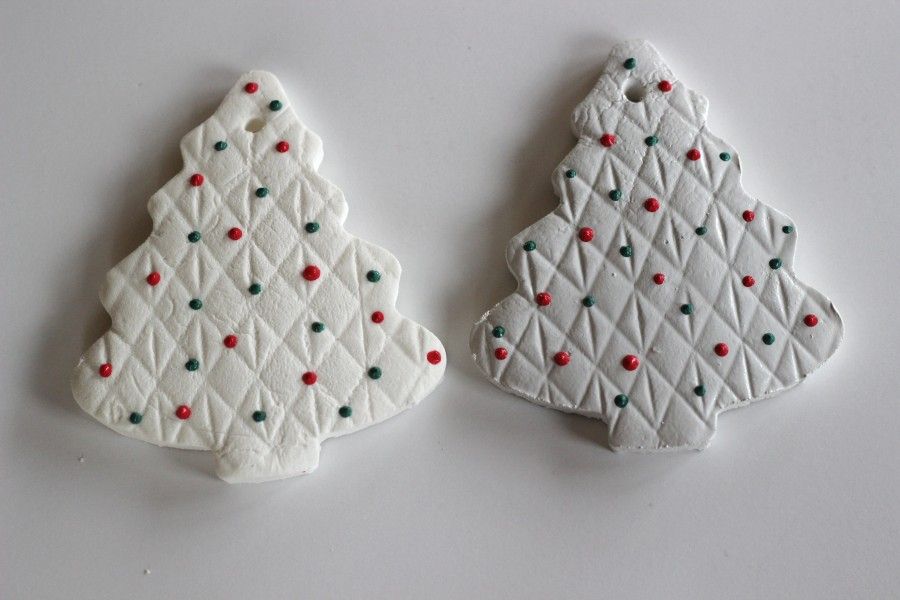
    The tree on the right had the spray paint. The left was plain, just air dried.
    When I used off-white spray paint, it looked too yellow. So, for my white ornaments, I left them plain.
    I did buy puffy paint to make the little painted on ornaments. Loved that look! Here is my green spray painted ornament with some puffy paint ornaments.
    Green painted Christmas tree ornament

    I think this would be a fun activity with kids!

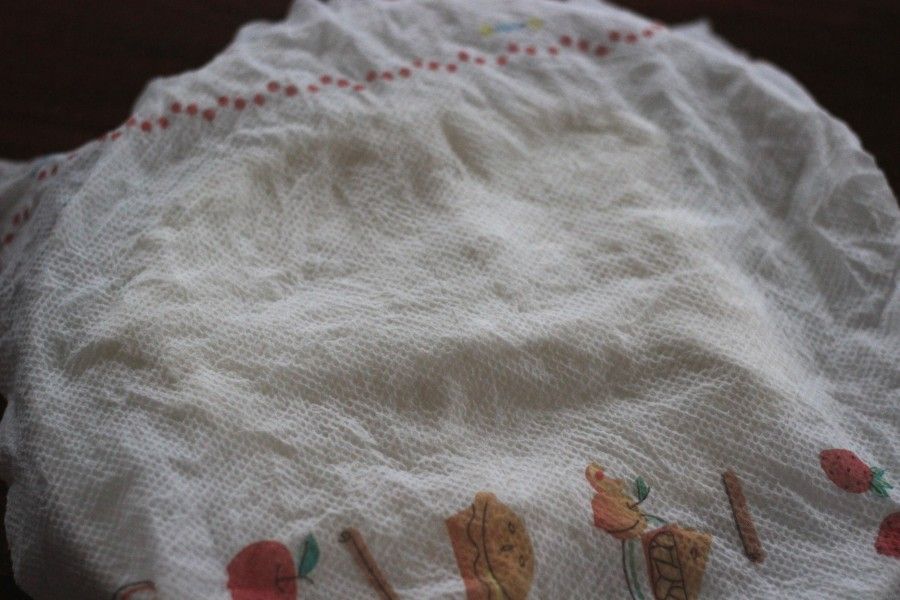
    Oh, one more tip. Do not let these ornaments dry on parchment paper. The moisture from the ornaments makes parchment paper wrinkle and then you get that pattern in your ornament.

    Have fun with these! I plan on making some more!!


    More Christmas & Winter

    • Christmas village houses
    • Christmas Trees - without tree skirts!
    • Easy and Inexpensive Christmas Stair Garland
    • Dining Room Christmas Decor Tour
    326 shares
    • Share158
    • Tweet

    Reader Interactions

    Leave a Reply Cancel reply

    Your email address will not be published. Required fields are marked *

    Recipe Rating


    This site uses Akismet to reduce spam. Learn how your comment data is processed.

    Primary Sidebar

    Subscribe to Momcrieff

    Hi, I'm Susan Moncrieff! I love sharing easy recipes, especially those that take less than 30 minutes and have less than 5 ingredients. I'm passionate about gardening and creating flower planters. My home is 100 years old and sometimes you will see it in my posts! It was a true fixer upper and I love it!

    More about me →

    Trending Articles...

    • My Raised Garden Beds
    • 2 Ingredient Pumpkin Muffins
    • 15 simmer pot recipes
    • Knob and tube wiring
    • Shortbread cookies
    • How to plant flower pots
    • Banana chocolate muffins - 3 ingredients.
    • Three Ingredient Peach Cobbler

    Footer

    ↑ back to top

    About

    • Privacy Policy
    • Advertising and Disclosures
    • Cookie Policy

    Newsletter

    • Sign up for emails and updates

    Contact

    • Contact
    • Media Kit

    As an Amazon Associate, I earn from qualifying purchases.

    Copyright © 2023

    © Copyright 2020 Momcrieff · All Rights Reserved ·

    326 shares
    • 158