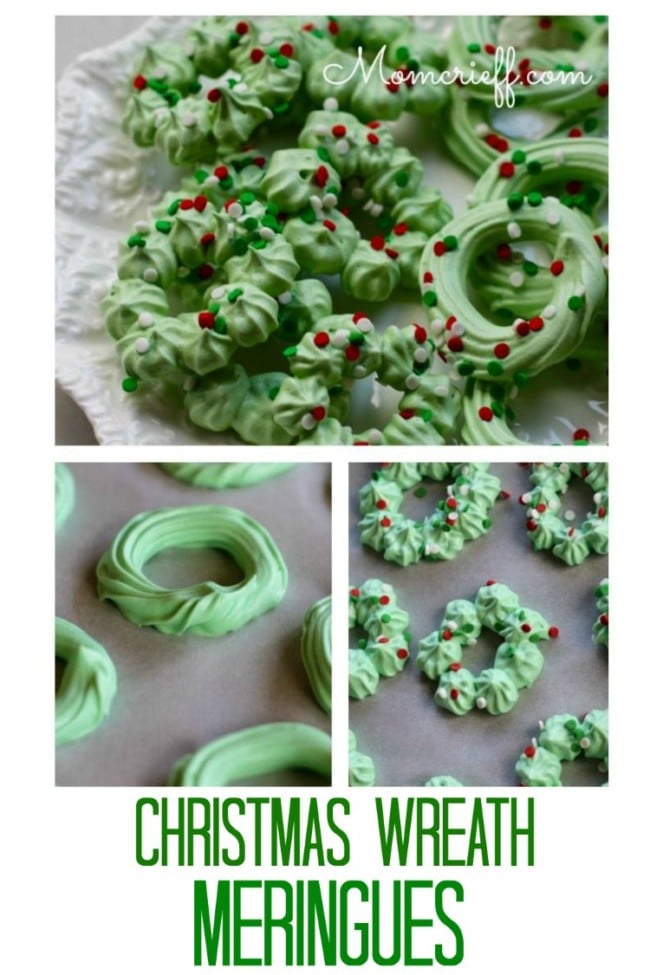
Indulge in the festive spirit with these enchanting Christmas wreath meringue cookies. Delicate and light, these meringue masterpieces are celebrate the look of the holidays. Each bite is a delightful symphony of sweet and airy meringue, making them the perfect holiday treat to share with loved ones.
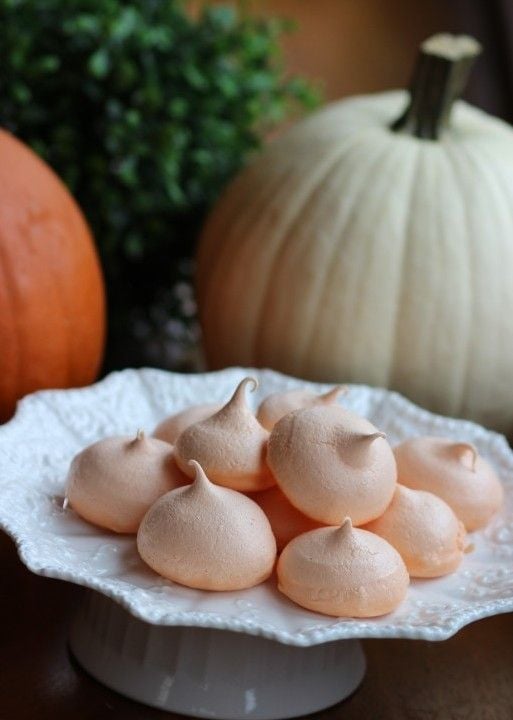
These are easy to make and are essentially dried (baked) at a low temperature in the oven. It is the low heat that helps to achieve this crunchy cookie/candy-like treat. I also make orange colored fall meringues. They are so easy and delicious to make. Plus, it's a pretty big batch.
Table of contents
Why I love making these
Christmas wreath meringues are a delightful way to get into the holiday spirit. Their delicate, crispy texture and beautiful appearance create a festive atmosphere.
Meringues are not only visually appealing but also incredibly tasty. They have a light, airy texture and a sweet, slightly tangy flavor that makes them a perfect holiday dessert.
This is an old-fashioned classic! You don't see these everywhere. I like sharing something that not everyone else is making.
Making meringues is a fun and creative activity. You can experiment with different piping techniques, colors, and decorations to create unique and personalized Christmas treats. You are in no way limited to making wreaths!
Important Tip
Humidity is not your friend when making these. Don't make them on a humid day.
Ingredients & Supplies
Egg whites are needed at room temperature.
A bit of cream of tartar helps stablize the egg yokes.
Super fine sugar is easier to use but if you don't have it, you can use regular sugar. It just will need to be beaten longer.
Vanilla is added to most things I bake!
Food coloring - if aiming for a pastel color, a liquid food coloring works. If trying for a darker color, you probably need to use gel food coloring.
Sprinkles are always fun to decorate with.
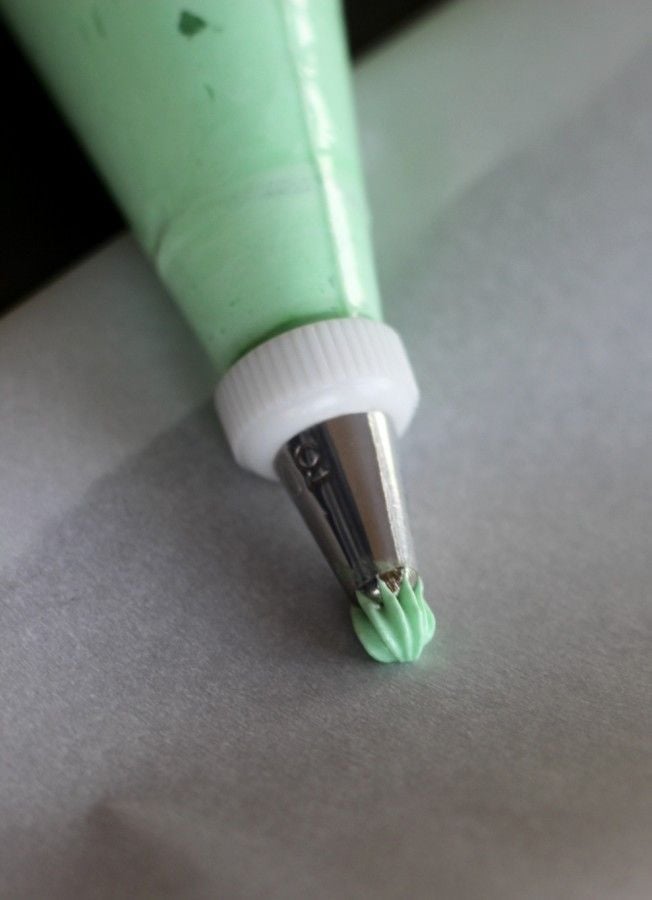
You will need a piping bag and piping tip. Buy the bigger bags. And, get disposable ones. It makes cleanup much faster! Make sure you are piping onto either parchment paper or silicone mats. No issues with sticking at all, then!
Instructions
Preheat oven to 225 degrees F. Line baking pan with silicone mat or parchment paper.
Step 1
Add cream of tartar to egg whites and beat until frothy. I use a stand mixer. If using a had mixer, it just takes a little longer.
Step 2
Add sugar, a couple of tablespoons at a time to the egg whit mixture, beating constantly. Beat to dissolve sugar you add before adding more.
Step 3
Once mixture reaches stiff peak stage, add vanilla and food colring. Beat until well mixed.
Step 4
Scoop the meringue into a large ziplock bag or a piping bag. Cut a big hole in the corner and then fill up the piping bag using the ziplock bag. This keeps everything neater and less sticky. I have never been able to neatly get the meringue directly into the piping bag from the bowl. If there is a way, I don't know it!
Step 5
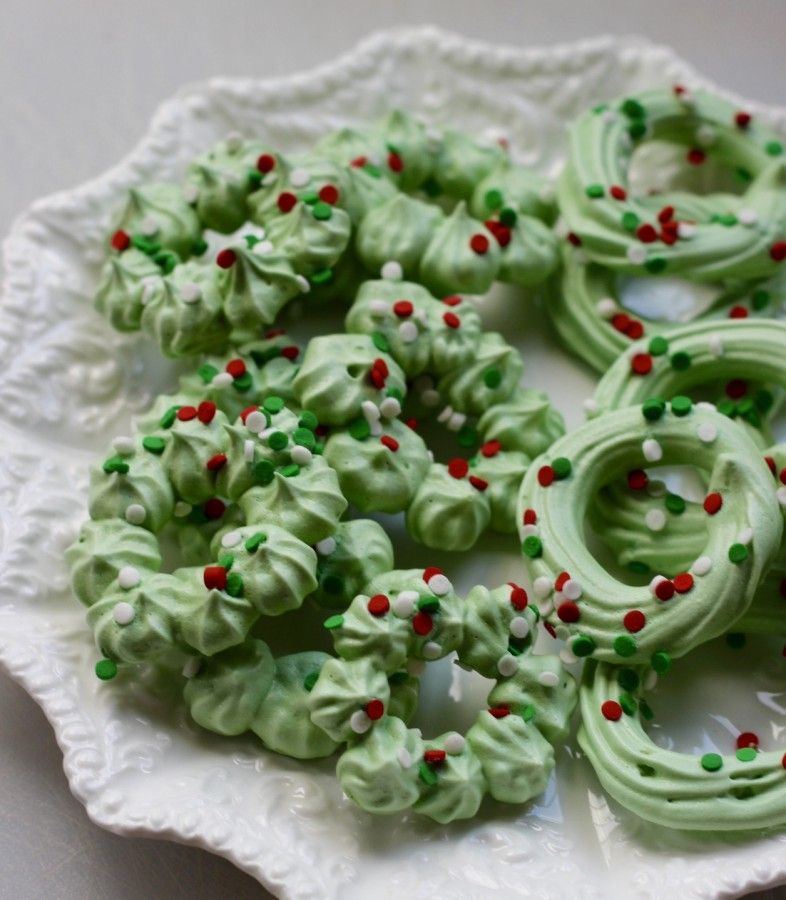
Also, I made two types of wreaths. One where you made the little buttons and the other where you just piped a circle. They both look and taste good! Obviously, I also added some confectionary sprinkles. Just the kind you can get at any grocery store.
Step 6
Bake at 225 Fahrenheit for 1 ½ hours. Turn oven off but leave meringues in the oven for at least 2 ½ hours. I tend to leave them overnight.
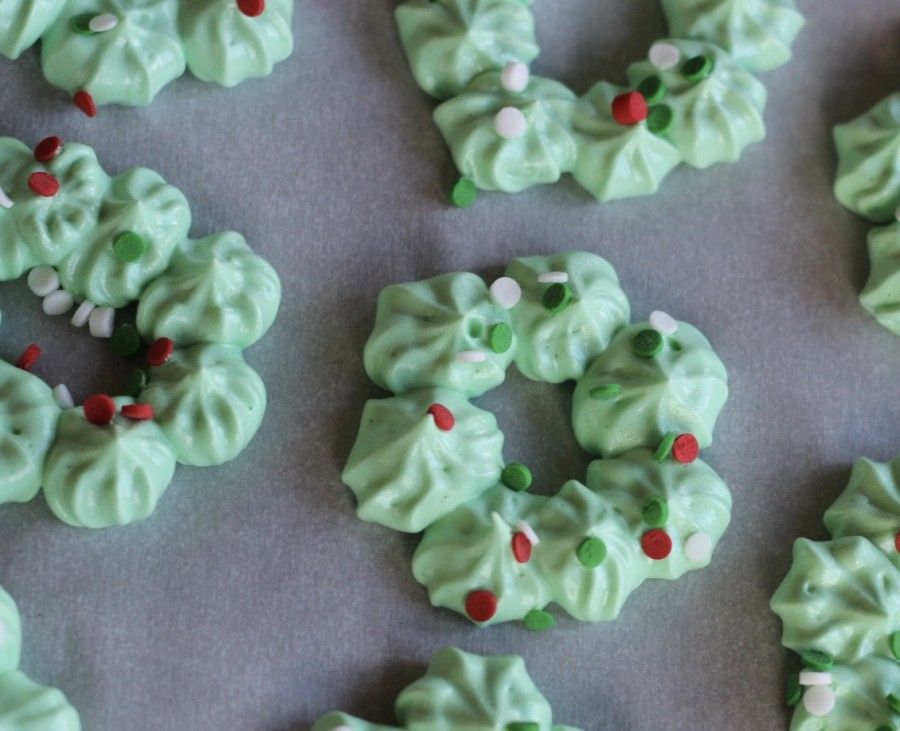
Sprinkle them on prior to baking, and most will stay on then. Don't you think the sprinkles make the wreaths look pretty? All ready and decorated for Christmas!
I did leave some of the simple circle wreaths plain. But some I decorated. Take a look at the directions. Easy! Just give yourself a bit of time and make sure you have all your ingredients premeasured and ready to go.
Storage
Store in a sealed container at room temperature for up to a week. Waxed paper is recommended between layers.
If your meringues get sticky, bake for about 15 minutes at 225, turn the oven off and let them cool in the oven.
FAQs
I don't make these on a humid (rainy) day.
Other tips are to make sure the egg whites are beaten to stiff peaks and to make sure to add sugar a bit at a time. I've had issues with the egg whites fluffing up the way they should on humid days.
Make sure to bake them for the 1 ½ hours at 225 and let them sit in the turned off oven. They will be dry to the touch. Once cool they are crunchy - more like candy than a cookie
Other Easy Christmas Cookies

Christmas Wreath Meringue Cookies
Ingredients
- 3 egg whites room temperature
- ¼ teaspoon cream of tartar
- ¾ cup super fine sugar regular sugar is ok but you need to beat longer
- ½ teaspoon vanilla
- Food coloring Optional - I used about a dozen drops to get the shade of green I wanted. If you want darker, I would recommend going to a gel food color.
- Sprinkles to decorate optional
Instructions
- Preheat to 225 Fahrenheit. Line baking pan with silicone mat or parchment paper.
- Add cream of tartar to room temperature egg whites and beat until foamy. (Best to use a stand mixer. A hand mixer works, just takes a little longer)
- Add sugar, a couple of tablespoons at a time, to egg white mixture, beating constantly. Beat to dissolve sugar before adding more sugar.
- After mixture reaches the stiff peak stage, add vanilla and food coloring. Beat until well mixed in.
- Bake at 225 Fahrenheit for 1 ½ hours. Turn oven off but leave meringues in the oven for at least 2 - 3 hours. (I leave them in overnight).
- Store in a sealed container. Waxed paper is recommended between layers. If your meringues get sticky, bake for about 15 minutes at 225 and they should dry out again.
Notes
Store in a sealed container. Waxed paper is recommended between layers. If your meringues get sticky, bake for about 15 minutes at 225 and they should dry out again.
Nutrition (estimate)
Leave a Reply